Lead generation and conversions are crucial for the success of any online business.
You’d want to convert a one-time visitor into a subscriber and then later into a customer.
Luckily, there are tools such as Kadence Conversions that help you easily generate leads without needing specialized knowledge or skills.
In this Kadence Conversions review, I will walk you through:
- In-depth detail at some of its powerful features
- A step by step tutorial on how to create your first opt-in form using Kadence Conversions
- Information on Kadence Conversions pricing
- Thoughts on whether it’s the right conversion tool for your business
Let’s get started.
Kadence Conversions Review: How It Can Help You with Conversions
Kadence Conversions is a Gutenberg popup maker that you can use to create opt-in forms, sale banners, cookie consent, and much more.
It is a powerful tool that comes with an extensive list of features to let you customize everything about the popups.
You can easily:
- Create any design using the WordPress Gutenberg editor.
- Add different trigger conditions for the popups to appear.
- Select which pages you want to display the popup
- Schedule popups in advance or create recurring popups and much more..
7 Kadence Conversions Features That I Like
Kadence Conversions comes with an extensive list of powerful features to let you create the popups exactly how you want.
Out of all the features, these are 7 features that I find exciting and useful.
1. Design Popup Using Gutenberg Editor
If you have been a regular reader of this blog, you’ll know how much I like the Gutenberg builder. It’s the way forward with the FSE coming in WordPress 5.9.
Kadence Conversions is a Gutenberg popup plugin that uses the same block editor that you are already familiar with. There is no new learning curve that you have to go through.
You can use any of the core blocks or third-party block plugins such as Kadence Blocks to design the popups.
Another advantage of using Gutenberg editor to create popups is that it won’t add any bloat to your website that can hamper the speed.
2. Freedom to Create Different Campaign Types
Kadence Conversions isn’t just a regular Gutenberg popup maker plugin. You can use to create different types of campaigns such as:
- Lightbox Popups
- Fullscreen Popups
- Floating Bars
- Slide-in Boxes
- WooCommerce Cart Abonnement
No matter what type of campaign you choose, Kadence Conversions lets you easily create mobile responsive popups out of the box.
3. Multiple Trigger, Display and Targeting Options
Kadence Conversions comes with detailed targeting options to exactly fine-tune where and to whom the popup should display. It is this area where it excels over other tools.
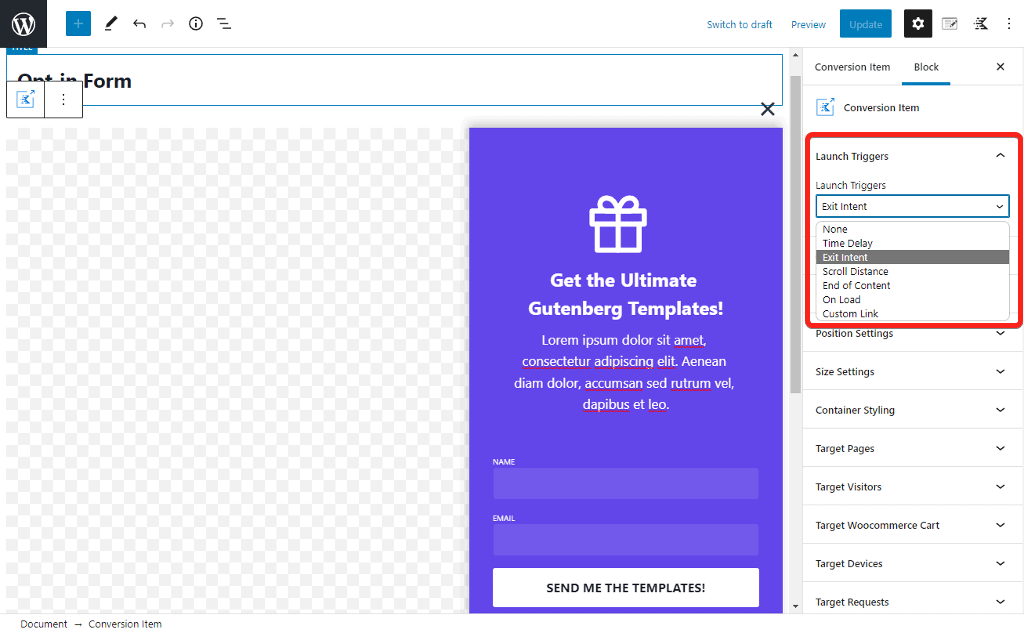
You get multiple trigger options such as:
- Time Delay – show popup after a slight delay when user lands on the page.
- Exit Intent – show popup when user tries to leave the website and hovers the mouse at the tab close button.
- Scroll Distance – show popup when user has scrolled the page to a certain distance in px.
- End of Content – show popup when users scrolls down to the end of the content.
- On Load – show popup as soon as the page loads.
- Custom Link – show popup when user clicks on a certain link or button.
Along with trigger events, another thing that I like about Kadence Conversions is that you can target the popups exactly how you want. You can specify the pages, user roles, and devices where you want to target the popups.
4. Analytics Dashboard
Once you publish a campaign, you can check how it is performing from the analytics dashboard. You can check statistics such as the views the campaign has received and its conversion rate.
It displays the stats in the form of a chart for better underrating the results. You can filter specific conversion items or display them all together in the chart.

The statistics are saved for 90 days, and you can have the chart show the performance for the last 7 days, 30 days, or 90 days.
If they could allow users to select a custom date range, that would be useful.
5. WooCommerce Features
If you have a WooCommerce store, Kadence Conversion can help you boost revenue with popups showing deals or creating urgency with countdown block.

It lets you show targeted popups based on the products in a cart or the total price of the cart. By using the exit intent trigger, you can show a popup at the right time and reduce the number of abandoned carts.
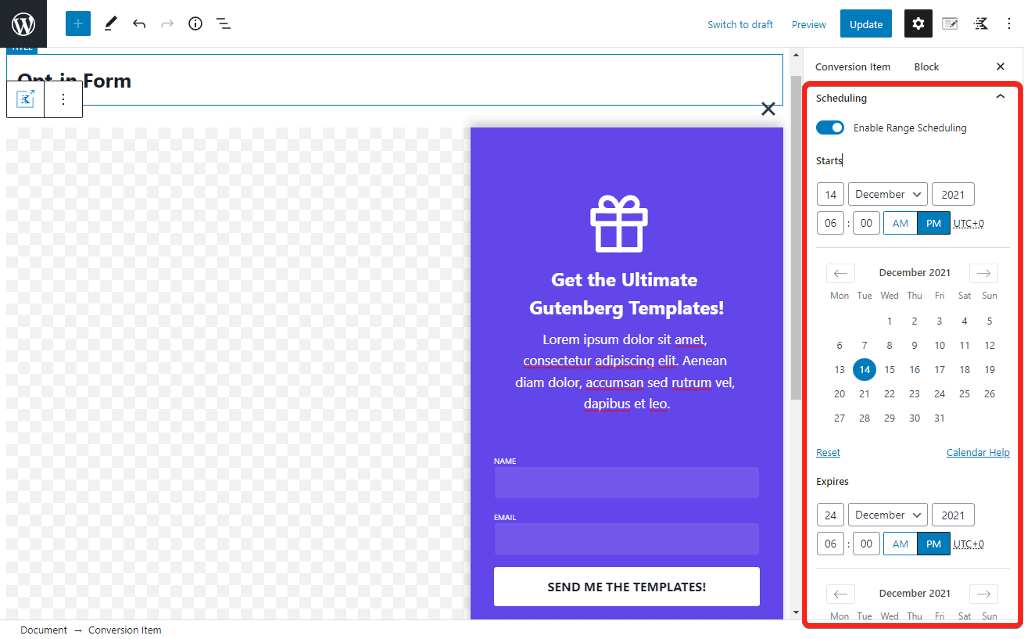
6. Scheduling
Kadence Conversions comes with a scheduling feature wherein you can schedule the campaigns in advance. This is a useful feature that one can make use of during the holiday season. You can schedule your holiday campaign well in advance instead of publishing them at the last minute.
It lets you select a date and time range between which the campaign will be live.
That’s not all it can do. You can even set up recurring campaigns that only appear on the website on specific days of the week and at specific times.
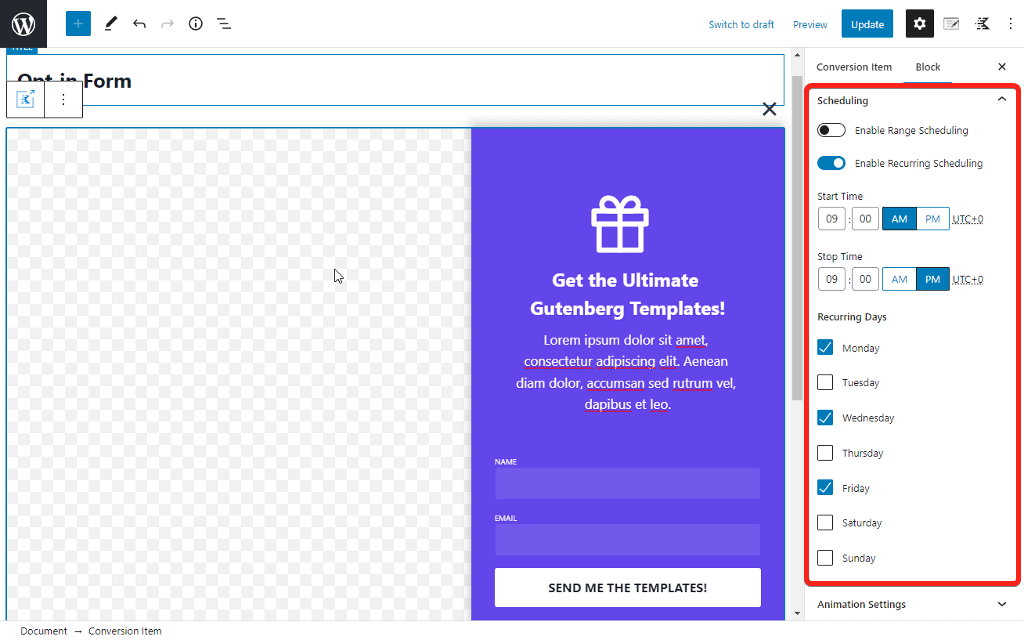
This is a very cool feature that an industry like restaurants can use.
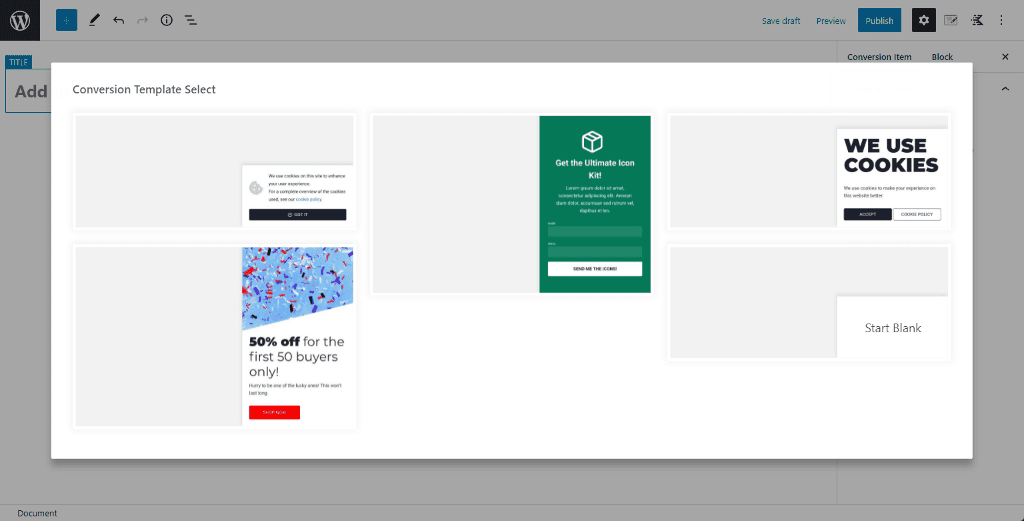
7. Popup Templates
Who doesn’t love templates? They save you time and provide you with professional designs with the click of a button.
Kadence Conversions comes with templates for each campaign type that you can add to the editor with a single click. At the time of writing this review, the template library contains a small number of templates, with the majority of templates created with the Kadence Blocks plugin.
There are even more features but I think these are the 7 best features that define what Kadence Conversions is.
Let’s now make use of these features to create our newsletter opt-in popup using Kadence Conversions.
How to Create an Email Opt-In Using Kadence Conversions
In this step-by-step tutorial, I will show you how to create an email opt-in popup easily with Kadence Conversions.
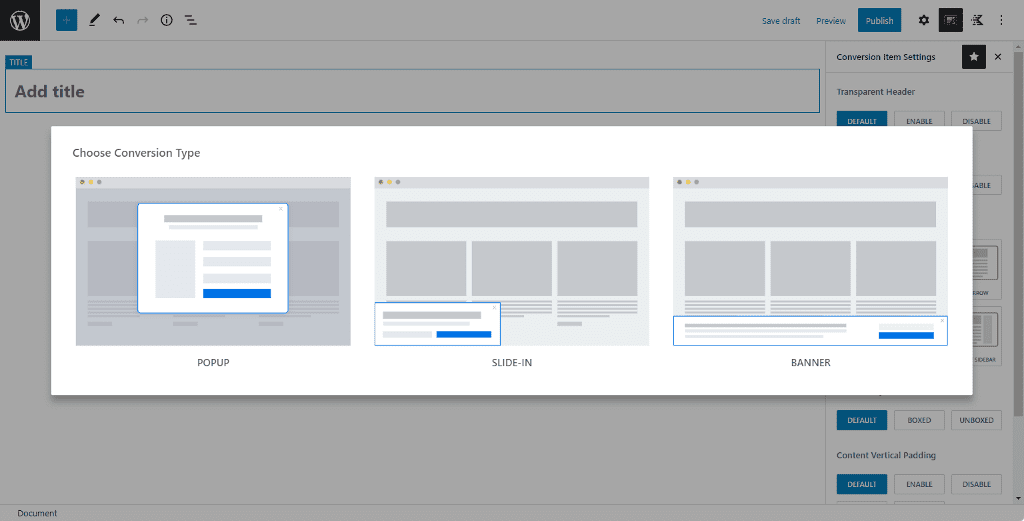
Step 1. Choose the Conversion Type
When you install the Kadence Conversions plugin, a new menu item named Conversions is added to the WordPress navigation menu.
To create a new campaign, go to Conversions → All Conversion Items and click on Add New.
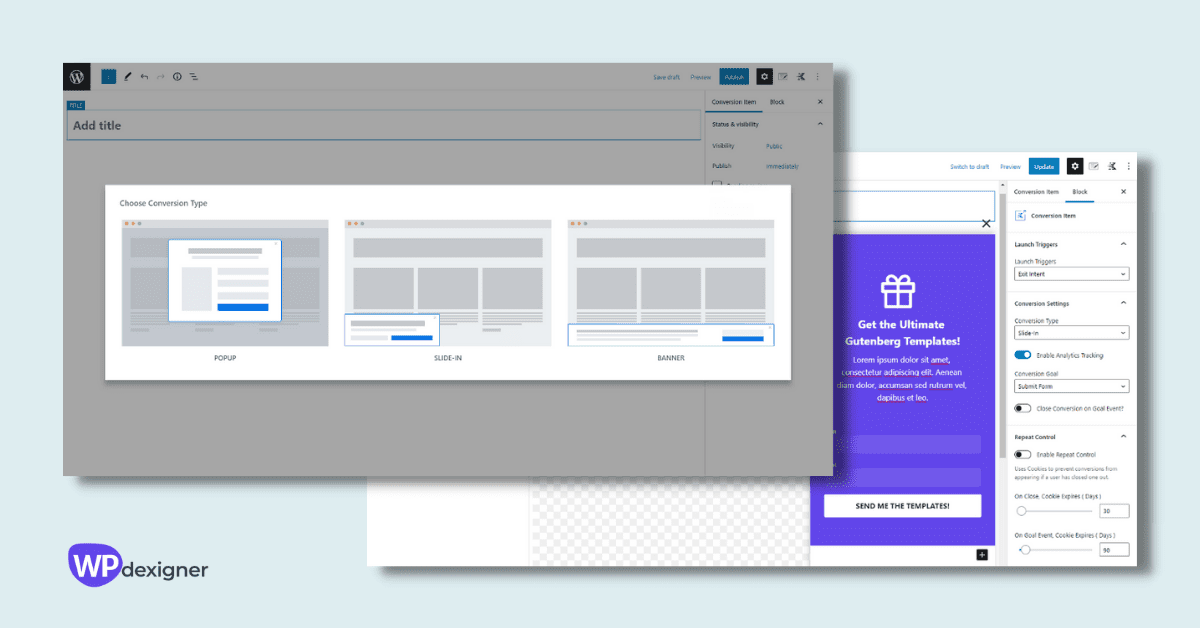
A popup will appear and you’ll need to select the type of conversion you want. The three options it provides are:
- Popup
- Slide-in
- Banner
For the email opt-in form, we’ll select the slide-in type.
Click on it and you’ll be presented with a small library of templates. You can select any template from the list or start from blank.
We’ll select the ready-made template and later customize it to match our branding.
Once the template is added to the Gutenberg editor, give your conversion a title and edit the content of the template.
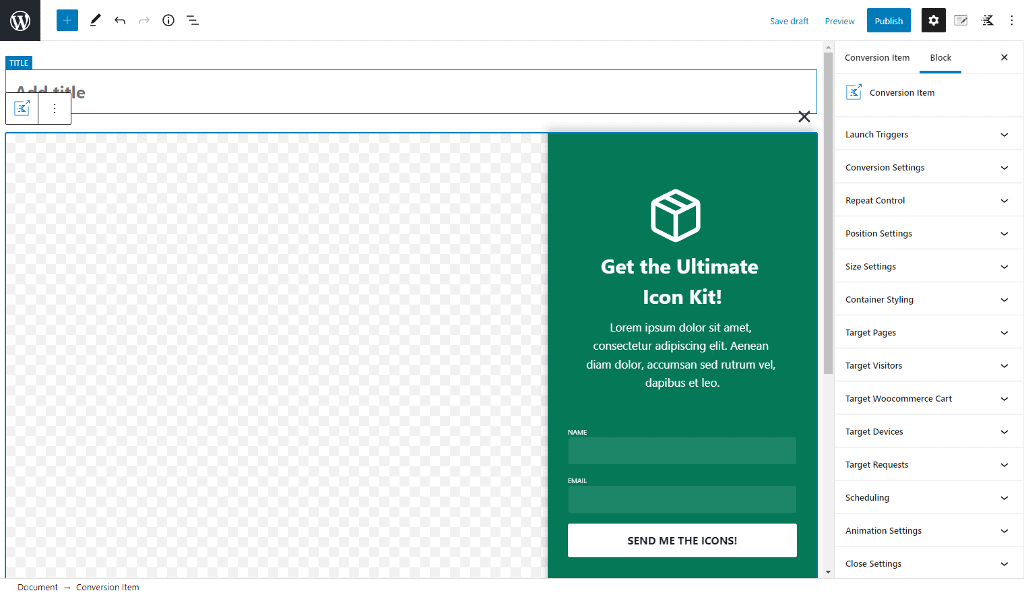
All templates from Kadence Conversions are designed using Kadence Blocks, so make sure you have it installed on your website.
Step 2. Connect Your Form
Kadence Blocks comes with a form block that we can use to create the email opt-in popup.
Click on the form fields and go to the Actions After Submit tab and select email service.
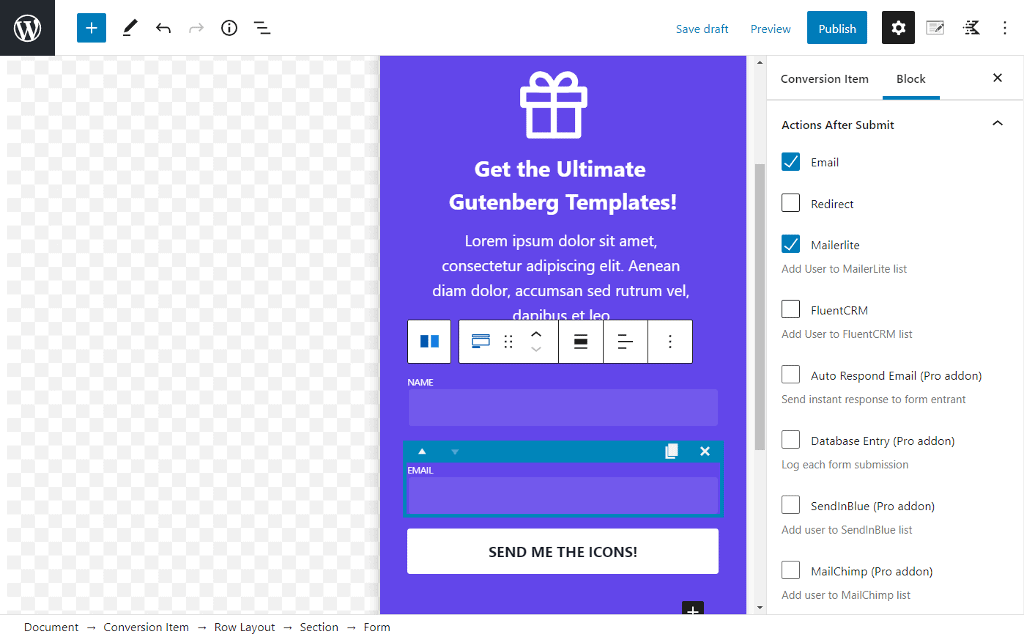
The free version allows connection through API to MailerLite. If you have the Kadence Blocks Pro, you can connect it to Sendinblue, Mailchimp, or even to FluentCRM.
Whatever you select, a new tab will be added where you can connect the API key.
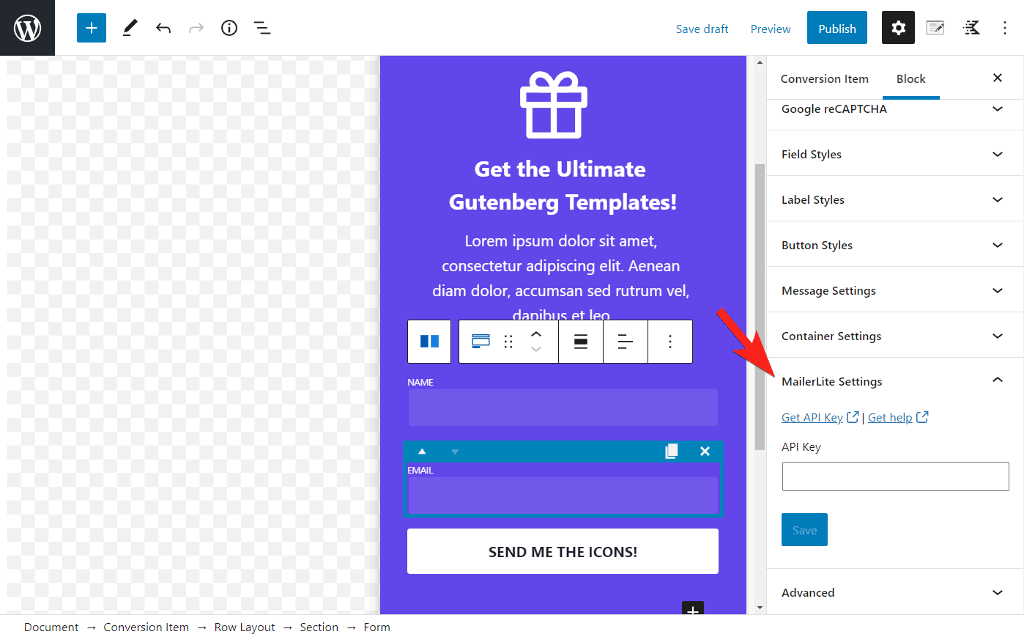
This will add people who fill out the details in the popup to your email list.
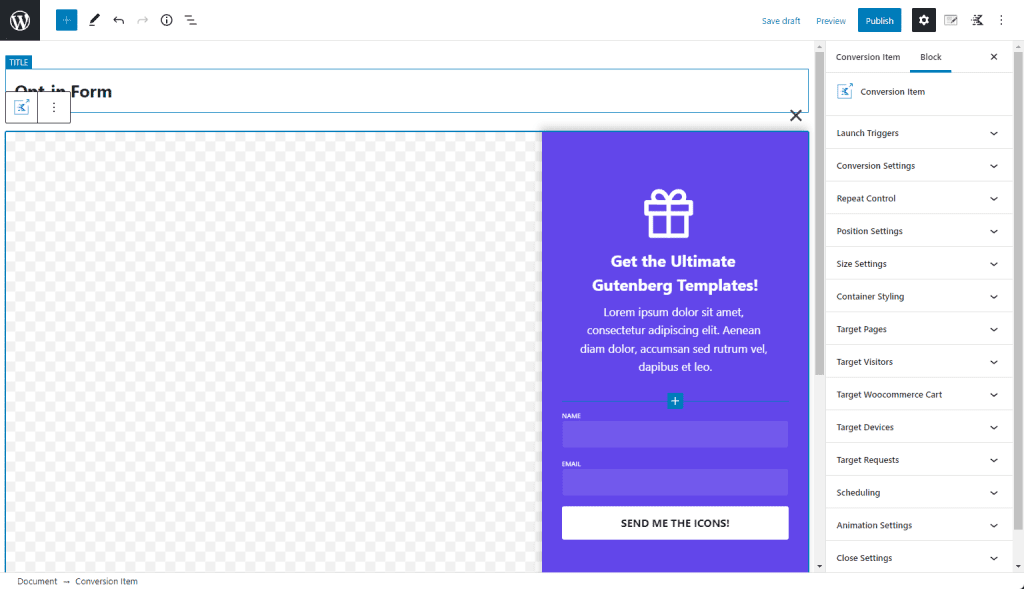
Step 3. Choose Trigger, Display, and Targeting Options
Once your form is set up, you know need to select the popup trigger and set the display condition.
In the editor, open the List View by clicking the icon at the top or press SHIFT+ALT+O and click then Conversion Item from the list.

This will open its settings in the sidebar.
There are many options that Kadence Conversions provides to help you target the right visitors. Let’s check out the options we’ll need for the opt-in form.
Launch Trigger: The first option is the trigger and you can select between various options. I want the popup to show up on exit intent and hence I have selected the same. You can select any other option and configure its setting.
Conversion Settings: If later at any point you want to change the conversion type, you can do it from here. Also, you can enable analytics tracking and define the goal for conversion.
Repeat Control: You don’t want to show the same popup to the same people on repeat. This will frustrate them and create a bad user experience. You can enable Repeat Control and define the number of days before the popup appears again for the visitor. This is done by injecting cookies into the user browser
Target Pages: Add a display rule by selecting the pages you want to display the popup on. There’s a big list of pages that you can add to fine-tune the targeting. In the same settings, if you want to exclude certain pages, you can do that too.
There are other options too but we don’t need to configure those for our opt-in form.
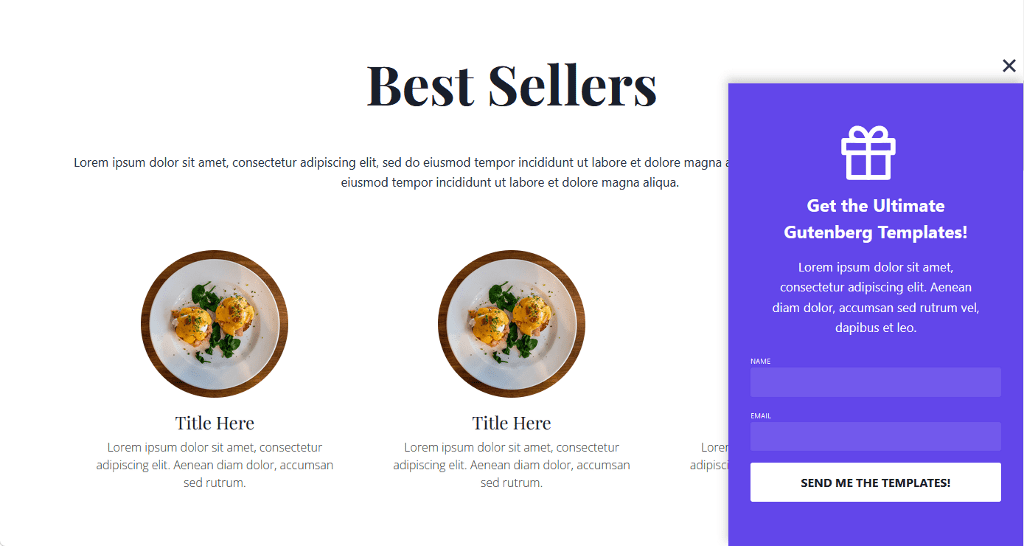
Step 4. Publish your Kadence Conversions Opt-in Form
Once your opt-in form design and configuration is ready, it’s now time to publish the conversion. Click on Publish button at the top and your opt-in form will be live on the website.
You can go to Conversions → Dashboard and view the opt-in form analytics.
Kadence Conversions Pricing
Kadence Conversions comes as a standalone plugin as well as bundled with the Kadence membership.
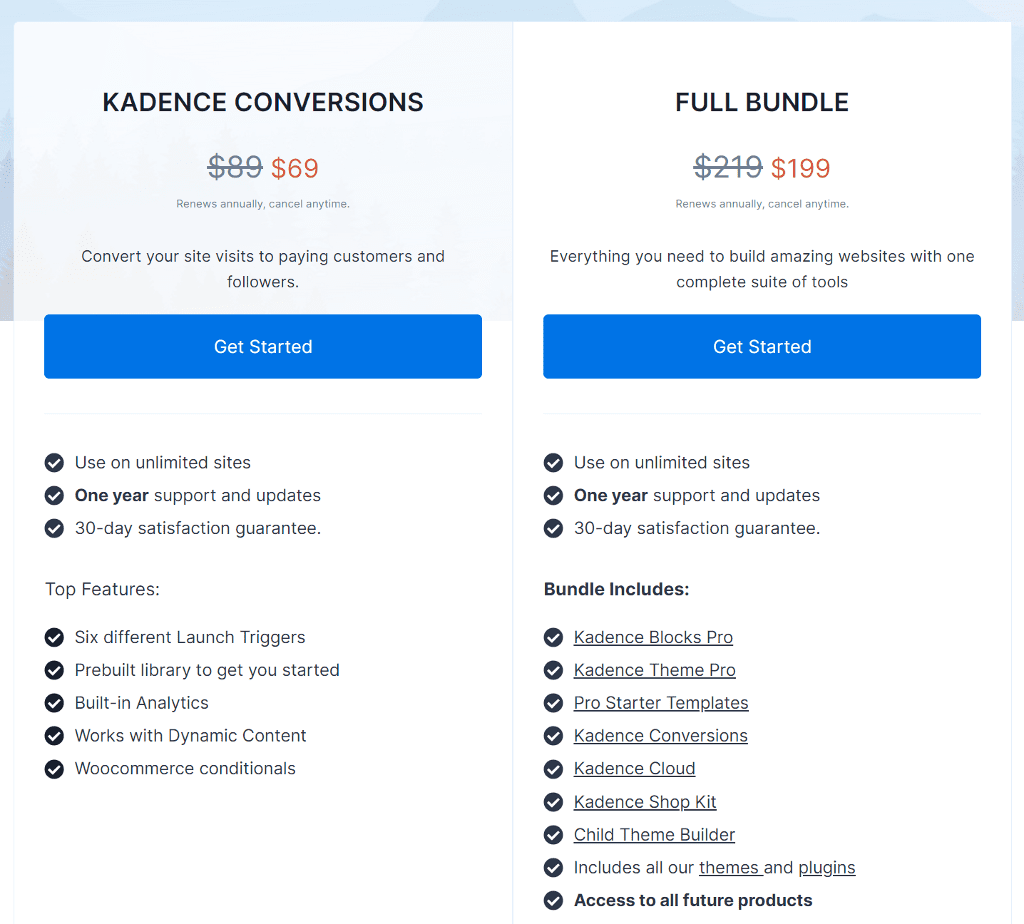
The standalone plugin costs $69/year and you can use it on unlimited websites. All of the features of the plugin are included in this plan and you can create unlimited campaigns.
The Kadence Membership plan costs $199/year and includes all other plugins from the Kadence website.
Kadence Conversions Review: My Verdict
Kadence Conversions is a promising plugin for those looking for a Gutenberg-based solution for website conversions. It comes with extensive options to help you target the right kind of visitors and increase conversions.
If you have a WooCommerce website, you can use the plugin to reduce abandoned carts and increase sales. Overall I am impressed with the plugin as version one is packed with so many features. There are some features like the A/B test that I expect the Kadence team to add in future updates.