The Elementor website builder makes it easy to create a custom website design for beginners with no knowledge of coding. It comes with features such as theme builder, popup builder animations which makes it a feature-rich website building tool.
It is now making it even easier to create complex, unique layouts with the introduction of the Elementor Container widget.
The current section and column widget is being replaced by the container widget.
In this article, we’ll explain to you what CSS flexbox container is, how it will change the design workflow, and how to convert your existing Elementor sections to Elementor flex containers.
What is CSS Flexbox Container?
CSS Flexbox is a layout mode that allows for complex layout design easily. It is a new way of thinking about the web page layout and it has been around for a few years now.
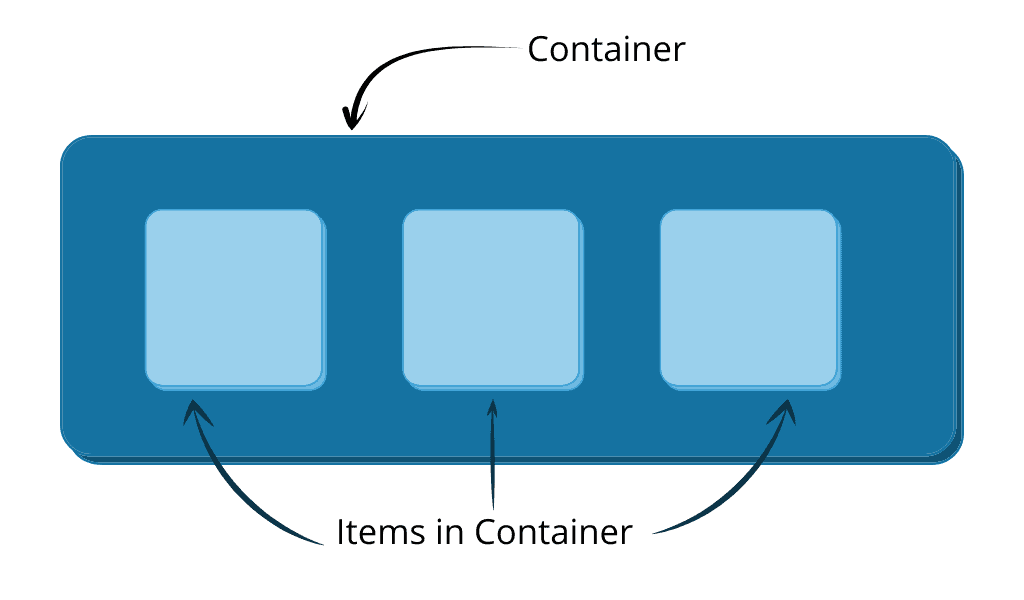
The CSS Flexbox model is based on the idea that the container should be able to adapt to its content, rather than the content adapting to the container. This means that you can have one container with many different items inside it, and they will all be laid out in an organized manner.
The CSS Flexbox model was introduced in 2009 as an alternative to traditional layouts like floats or tables.
You can refer to this guide to know more about how everything works in CSS flexbox.
What Are the Benefits of Elementor Container Widget
The Elementor Container widget provides many benefits compared to the traditional section and column layouts. It’s because of the benefits that Elementor has decided to switch away from it for page design.
Complex Layouts
The CSS Flexbox or Elementor Container makes it possible to create any type of complex layout. You get controls for flex item alignment, order, direction, length, and placement. You can also nest one container inside another and create complex layouts.
Reduce DOM Bloat
The use of Elementor Container reduces the number of columns to create a nested layout. It allows you to add multiple widgets inside a single container and align them using the various CSS properties. This results in optimized code output and thus increasing the performance of the page.
Increase Responsiveness
Elementor Container comes with the option to easily set the direction for the container items and change their order based on devices.
As seen across other widgets, the container widget also comes with options to set settings based on devices.
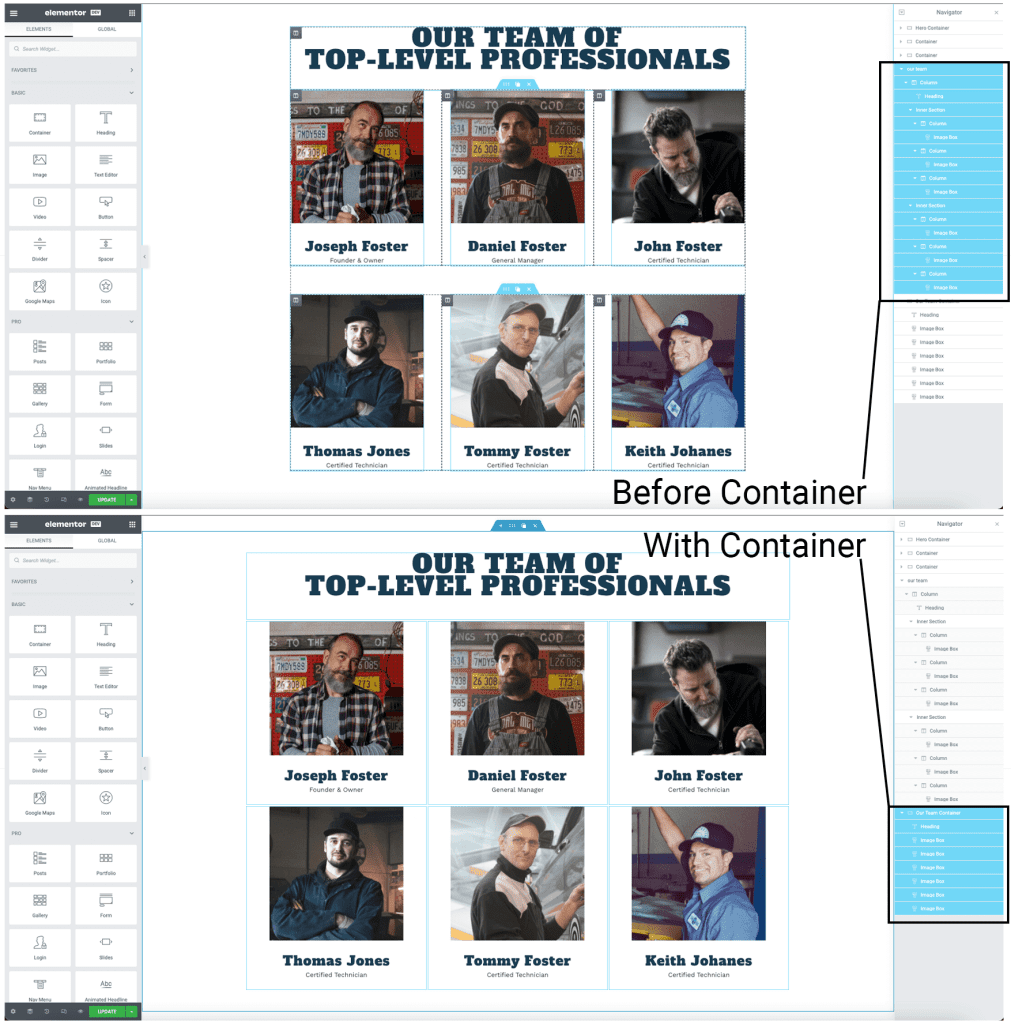
What Happens to Old Layout Created With Section Row and Column
If you have old layouts or Elementor templates that you created using the section, row, and column, they will remain unchanged and continue to function as before.
The Column widget remains active but is no longer visible in the widget panel. If you want to add a new layout to a page, you’ll have to use the container widget rather than the column widget.
To create columns within the section, you’ll need to nest containers within containers.
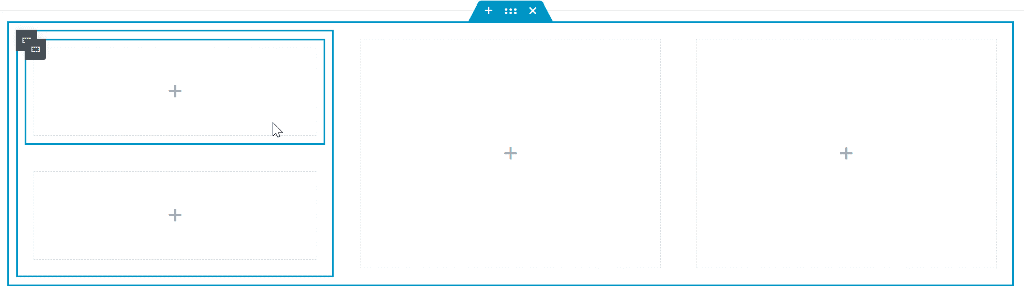
If you have a page created with both the section layout and the container, you can check the navigator to see new containers marked with an icon.
Also, the container layout will appear with a dark blue wrapper when you hover the mouse pointer over it.
How To Enable Container in Elementor
The Container widget is not yet available in the stable version of Elementor.
However, by installing an additional Elementor Beta plugin, you can test the upcoming features. It is not advisable to install the plugin on a production website as it can break your website.
Once you have the plugin installed and active on the website, you can navigate to Plugins → Installed Plugins and update the Elementor to the latest developer edition.
After that, navigate to Elementor → Settings and switch to the Experiments tab.

Scroll down and change the status of Container from Default to Active and click the Save Changes button at the bottom.

That’s it! You should now the Container widget in the Elementor editor.
How to use the Elementor Flexbox Container Widget
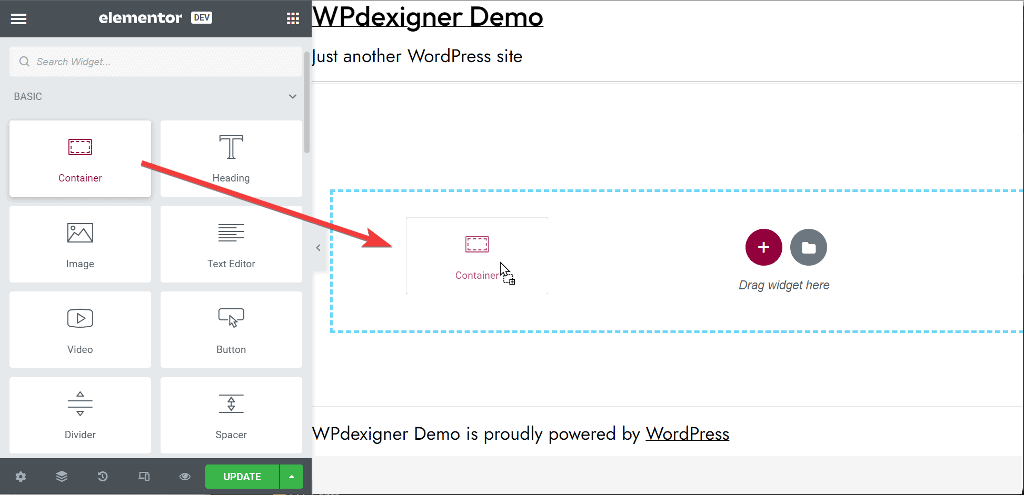
After you have updated to the latest version of Elementor, you’ll see the new Container widget in the Elementor widget panel.
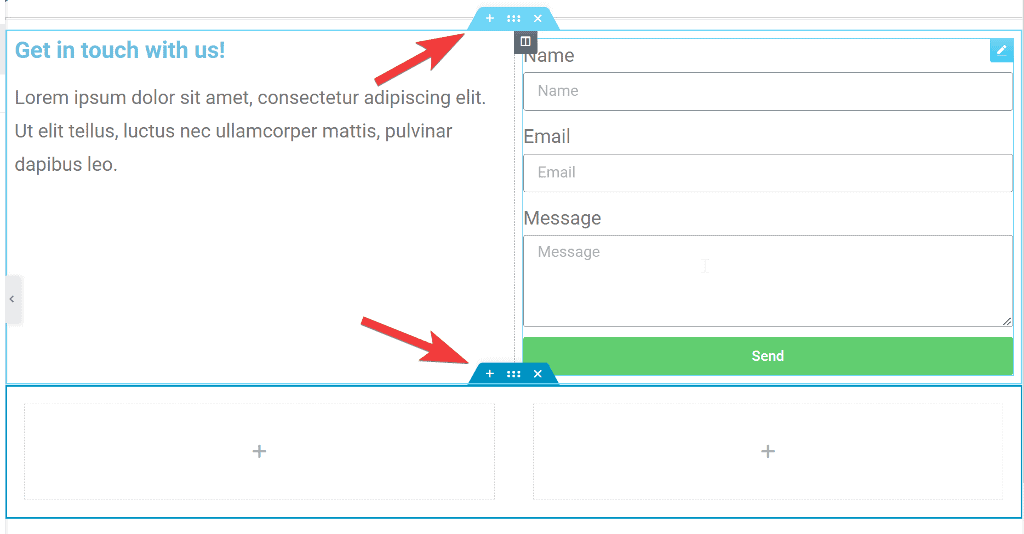
To start creating layouts with the container, you can drag and drop the Container widget into the editor.
You can further add additional containers inside the main one to create a nested layout.
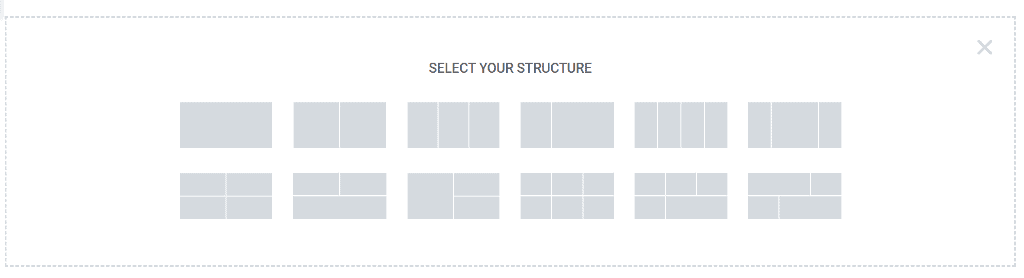
Alternatively, you can insert a predefined container layout using the marron plus icon (+) in the editor.
After you have added the number of containers, you get various options to arrange them. Some options will be similar to what you are familiar with the section widget. I will not explain such options and will only focus on ones that are new with the Elementor flexbox container widget.
The options are:
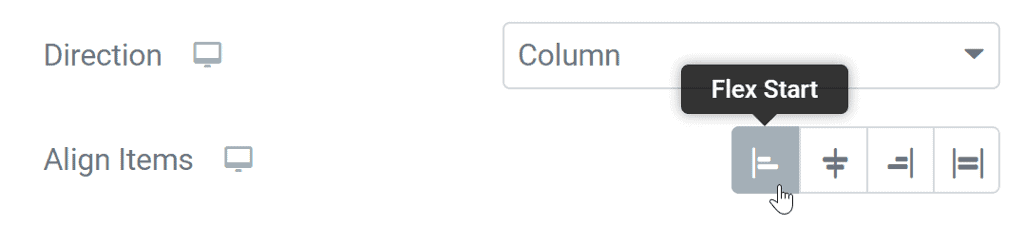
Direction: This option sets the direction of nested container. You can set it as column and the containers will appear one above another. If you set the direction as row, the containers will appear next to each other. the reversed direction will just change the order of the containers.
Depending on which direction you choose for the container, the next options of align and justify are swapped. I will explain the options with the container direction set as column.
Align Items: The align items will set the alignment of the inner content as start, center, end or stretch. This is with regards to the vertical axis.
Justify Content: The justify option will set the direction of the inner content as start, center, end, space between, space around or space evenly with regards to the horizontal axis.
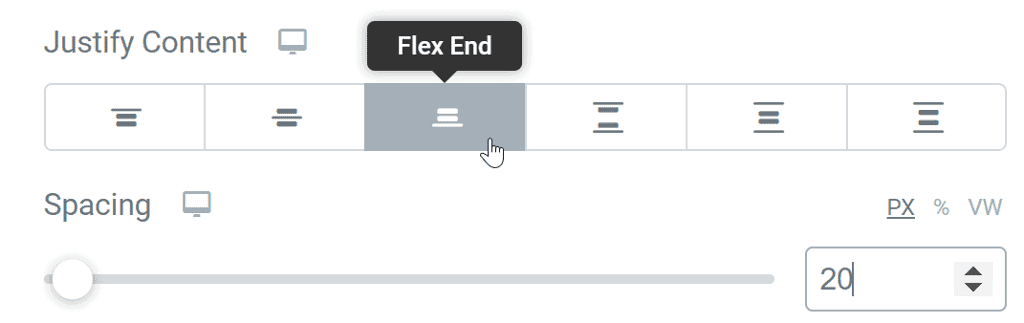
Spacing: It lets you define the spacing between the nested containers in px.
Wrap: It decides whether all items fit onto one line or or are flexible. If you set it to wrap, additional option to align appears in the panel.
The options in the Style and Advanced tab are familiar with what you had for the sections.
That’s it for the Elementor Container widget. It sure opens up new possibilities to create complex layouts easily. You may find it difficult at start, but once you get a hang of it, you wouldn’t want to switch back to the old section layout.
How to Convert Existing Section Layout to Container Layout?
Elementor lets you easily convert all of your existing section layouts into container layout with a click of a button.
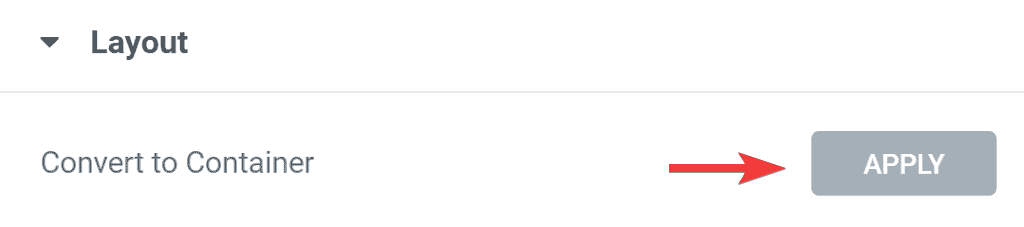
Once in the section settings, the convert option can be found in the Layout tab of the widget panel. When you click the Apply button, your current section layout will be converted to the Elementor Container layout.
That’s how easy it is. Since container widget is still part of Elemnentor beta, the conversion is a hit and miss at the moment. The layout when converted will require some editing to make it look exactly as before.
I’m hoping that when the Elementor Container widget is released in a stable version, the conversion will be seamless and won’t require any editing.