Elementor is an advanced page builder plugin that allows you to design your entire website using the drag and drop builder. This means that not only you can design the static pages of the website but also the dynamic pages such as the single posts and the archive pages.
In WordPress, single and archive pages are usually controlled by the theme settings, and you are limited to the options provided by the theme. With Elementor Pro, you can use the theme builder and design these pages the way you want. The advantage of using the theme builder instead of the usual theme settings is to have a custom design throughout your website.
In this article, let’s do a quick Elementor theme builder review and learn how to design dynamic pages of the website using it.
Elementor Theme Builder Review: How To Use It Like a Pro
For this tutorial, I am using the Blocksy theme along with the Elementor page builder. Theme Builder feature is part of the Elementor Pro, so make sure you have it installed on your website.
With the Blocksy theme installed, if you look at the blog archive, this is how it looks by default.

This kinda looks very basic. With Elementor theme builder you will be able to custom design these website parts easily.
The great thing about using Elementor theme builder is that it doesn’t matter what theme you use.
Let’s get to the main part now.
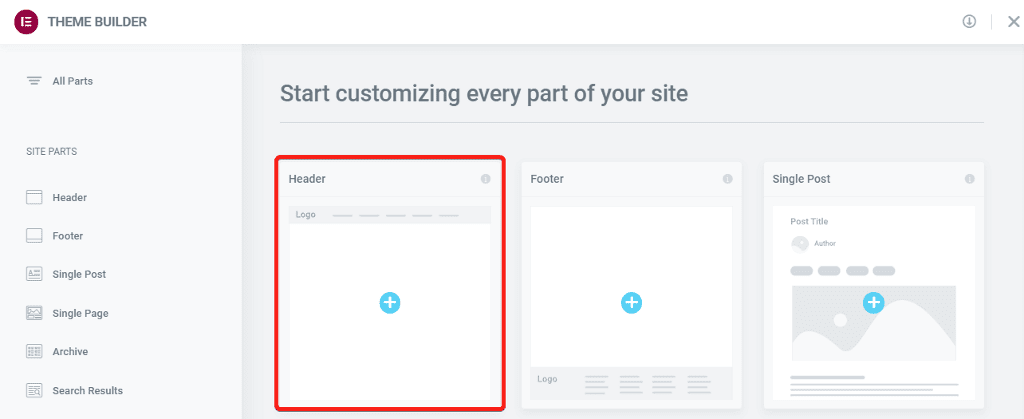
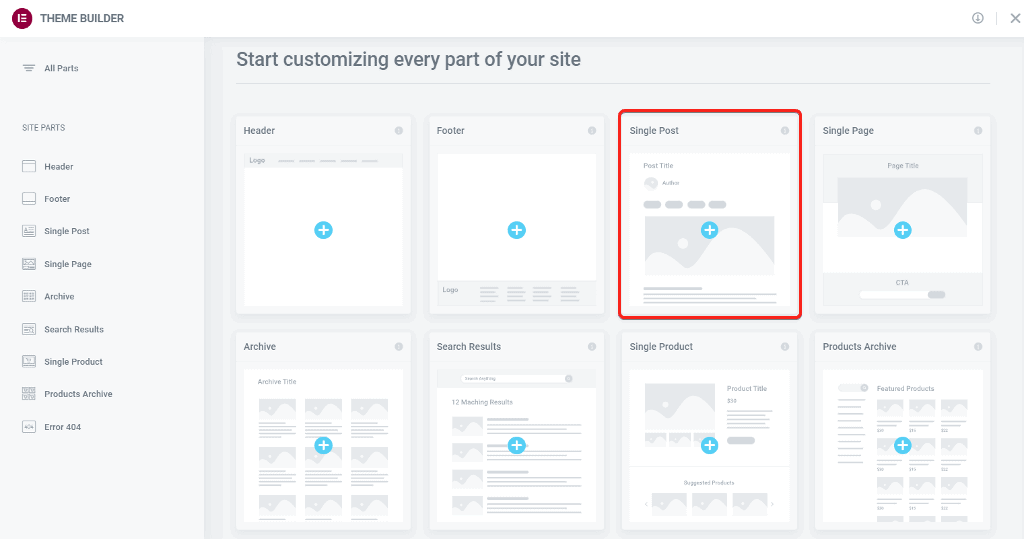
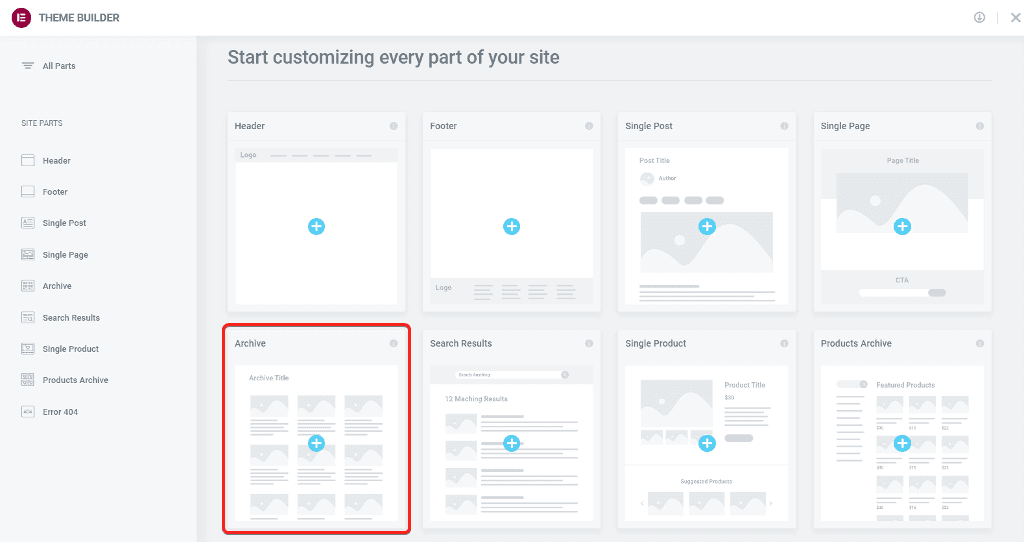
To access the theme builder, navigate to Templates → Theme Builder.
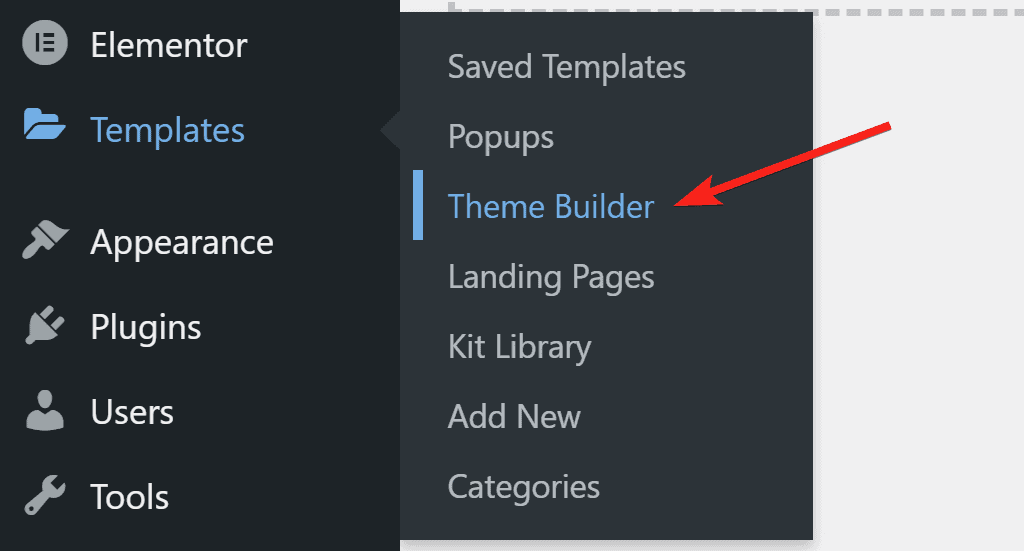
Here, you’ll see the theme builder dashboard that lists the parts of the website that you can design with it.

I like the dashboard as it not only looks modern but is also well organized. The placeholder images make it easy for beginners to understand what each option means.
Note: If you are seeing the old theme builder interface, you can switch to the new one by clicking the Try It Now button in the popup.

You can design the following pages using the theme builder:
- Header
- Footer
- Single Post
- Single Page
- Archive Page
- Product Page
- Product Archive
- Search Result
Let’s design the above-mentioned dynamic pages one by one.
You can click on any option and it will open the Elementor editor with the template screen. You can pick one of the predesigned Elementor templates or design your page from scratch.
Let’s see how we can design the dynamic parts of the website using the Elementor theme builder one by one.
1. Design Website Header
A header is the topmost part of the website that houses links to important pages of the website. It guides a user to navigate through the website.
Before we start designing the header, first we need to create a menu that will contain links to the pages in the header.
Create a Menu in WordPress
You can create multiple menus and hook them up to different locations on the website, such as the header and footer. We’ll see how to create a menu for the header.
From the WP dashboard, go to Appearance → Menus and enter a name for the menu.
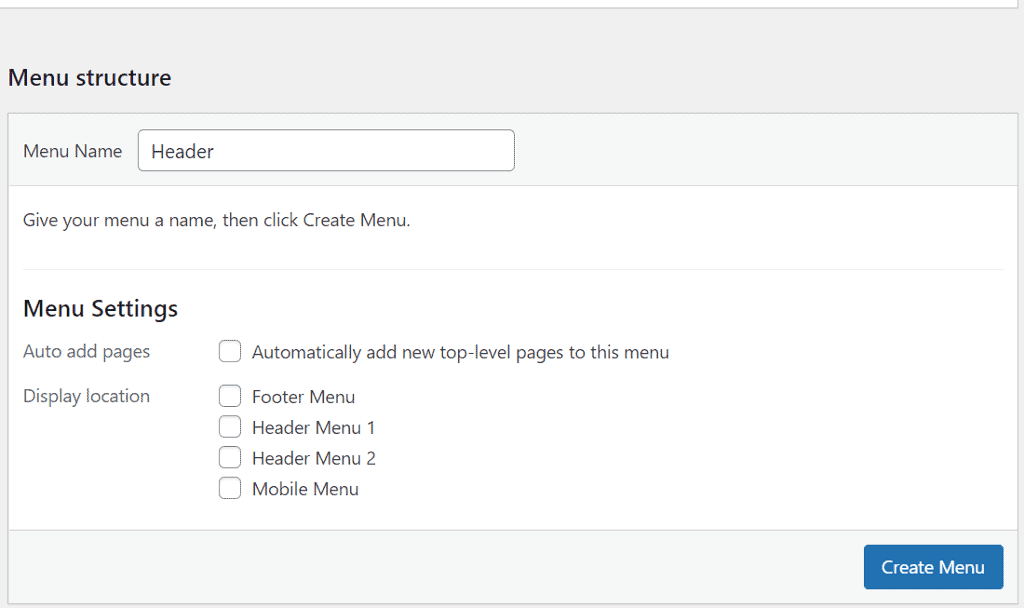
The name can be anything you want – just enter something you’ll remember later. You do not need to select a display location because we are creating this menu to be added to the header from the Elementor theme builder.
Make sure you don’t tick the Automatically add new top-level pages to this menu box. Checking that will automatically add new pages you publish to the menu and that can create clutter in the future.
Click on the Create Menu button and add links to the menu from the sidebar. You can add links to pages, posts, categories, or any custom link you want. Once you have added the links, you can rearrange their positions using drag and drop functionality.
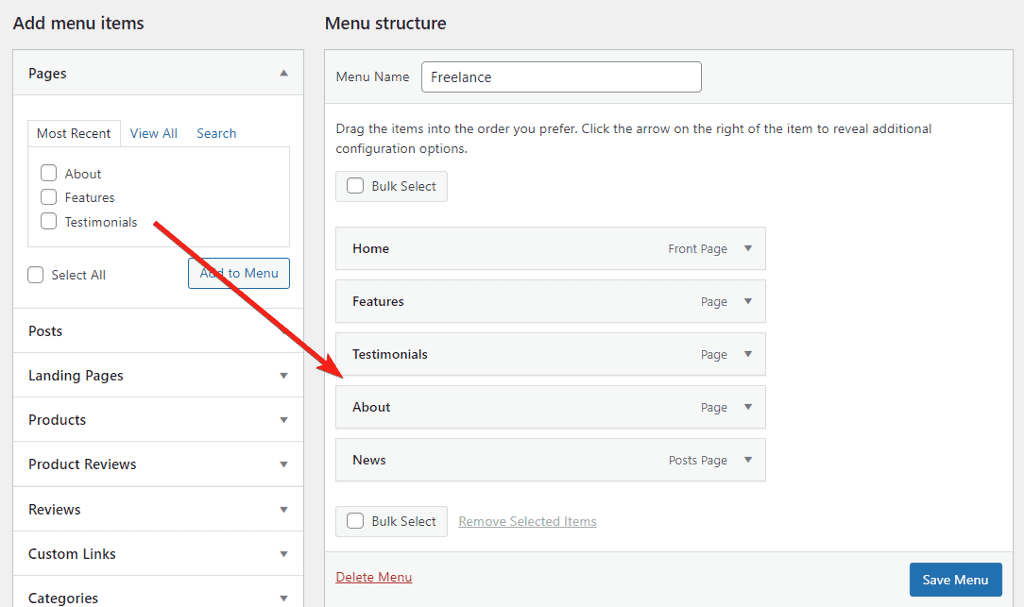
WordPress also gives the flexibility to create dropdown menus using parent and child relations. Drag and drop the child menu items under the parent and arrange them as shown in the image below.
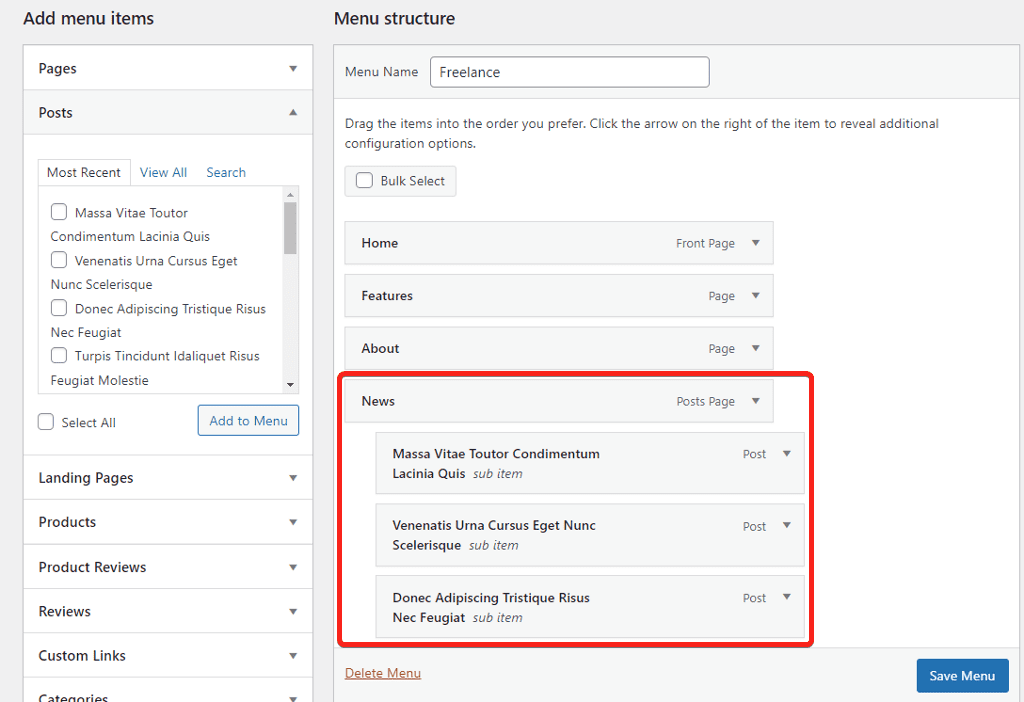
Once you have set the structure of your menu and have everything organized, click on Save Menu.
Now that we have the menu ready, let’s design the header using the Elementor theme builder.
Design Header Using Elementor Theme Builder
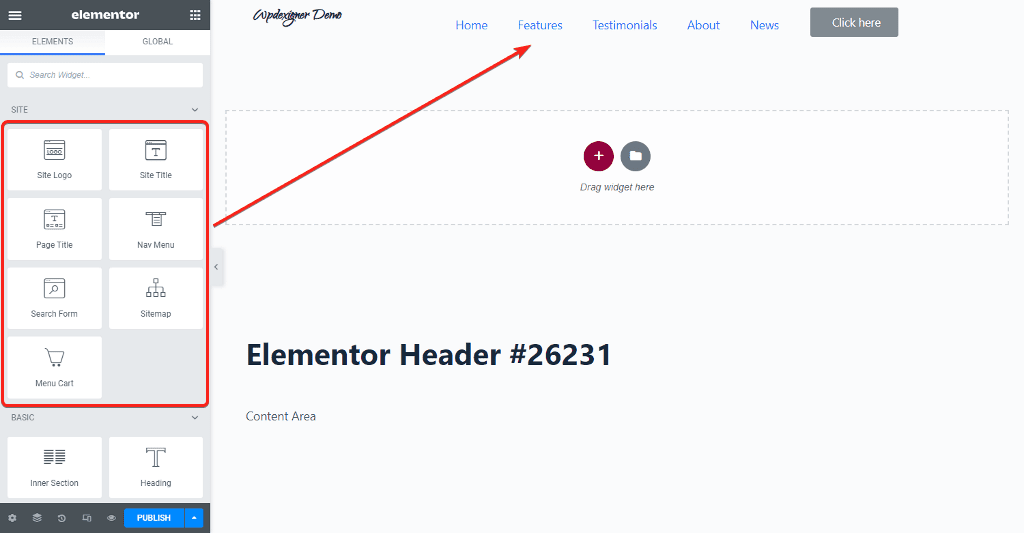
To access the theme builder dashboard, press CTRL/CMD+SHIFT+E and click on the Header item.
This will open up the Elementor editor with a window popup of the template library of header templates.
Elementor will display the required widgets at the top of the editor. You can insert them and change the style using the same Elementor editor that you’re already familiar with.
To view your header on a tablet or mobile device, click the screen icon at the bottom and then select the device on which you want to view the header. Elementor also allows you to define custom breakpoints. You can set the custom width by clicking the gear icon in the responsive design mode.

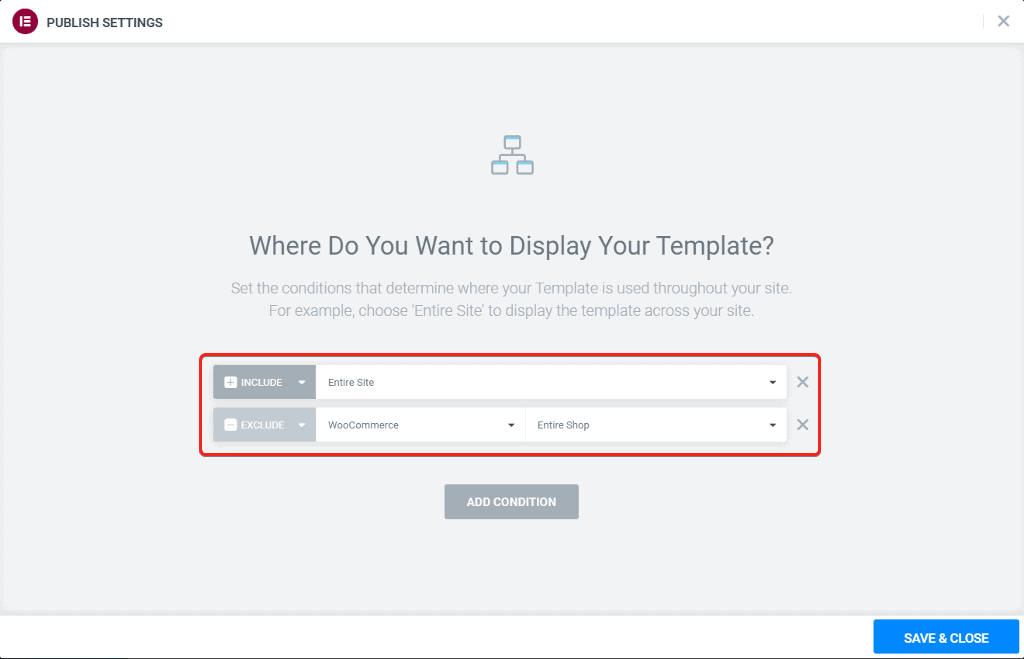
Once your header is ready, click the Publish button and configure the Display Condition. You can specify whether it should appear on all pages of the website or only on certain pages. When you click the Save & Close button, your custom-designed header will be visible to everyone who visits your website.
Second on our list is the footer section. Let’s move ahead and see how we can design one.
2. Design Website Footer
The process of designing a footer is very similar to that of the header. When you click on the footer option in the theme builder dashboard, the popup screen with footer templates will appear. You can preview those templates and then insert the one you want or start from scratch.
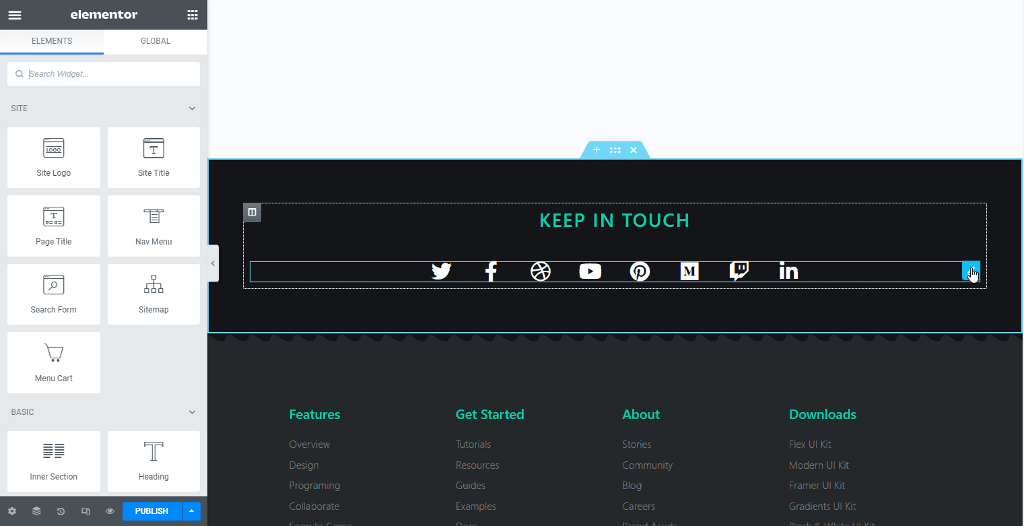
Typically, the footer contains links to various pages of the website, which are organized in columns. Similar to the header, you can create a menu for each column of the footer.
Once your design for the footer is ready, you can set the Display Condition for it similar to the header.
The two important sections of the website are ready! Let’s now move on to pages.
Design Dynamic Pages
We can use the same theme builder to create dynamic pages such as blog posts, single pages, product pages, and archive pages.
With minor differences, the single post, single page, and product page will all follow the same process; we will explain the process for one page and you can follow it for the others as well. The same is true for archive pages.
3. Design Single Post Template
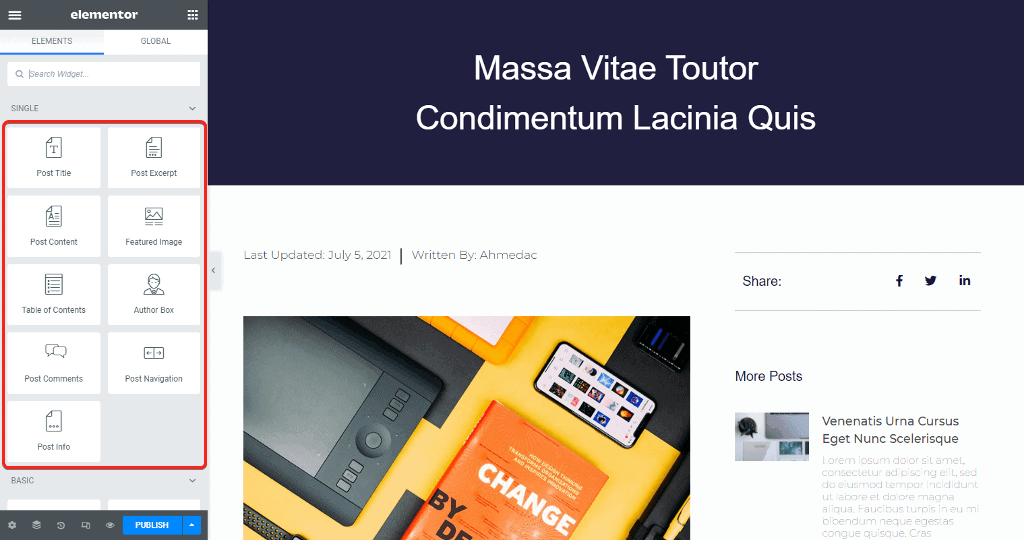
A single post page is the blog post page of the website. You can design it using dynamic widgets such as the Post Title, Post Content, and Featured Image in the Elementor editor. These widgets are filled with dynamic content from the blog post.
From the theme builder dashboard, click on the Single Post to open the Elementor editor.
You can insert a premade template or create a design from scratch, just like before. Elementor displays the relevant widgets at the top of the page depending on the template type.
When your design is complete, you can view a preview of how your posts will appear. To preview a post, click the gear icon in the bottom left corner and type the title into the preview settings. The editor’s content will dynamically change to the article you’ve chosen.
Once everything is ready, click on the Publish button and set the display condition as Include → Posts → All.

Click on Save & Close to exit the editor and make your design live on the website.
Let’s now check how to design a template that
4. Design Archive Template
The archive template is used to display the blog archive page, as well as the category and tag pages. These pages will list all your blog posts.
To begin, select the Archive option and either select one of the templates or begin with a blank canvas.
The editor will display the archive widgets at the top of the page, which you can insert into the page.
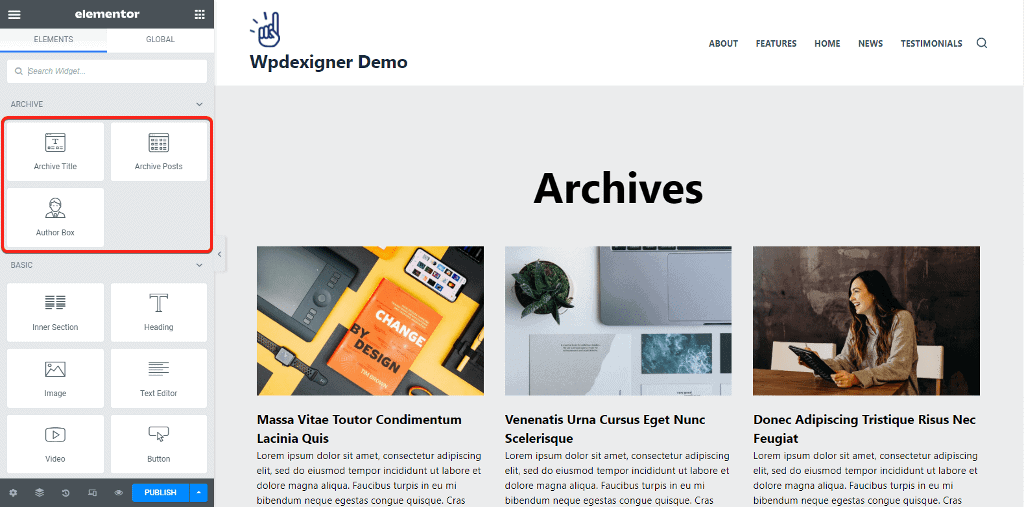
The Archive Posts widget is fully customizable, and you can choose whether to display the posts as a list or in a grid format. You have the ability to completely customize its appearance.
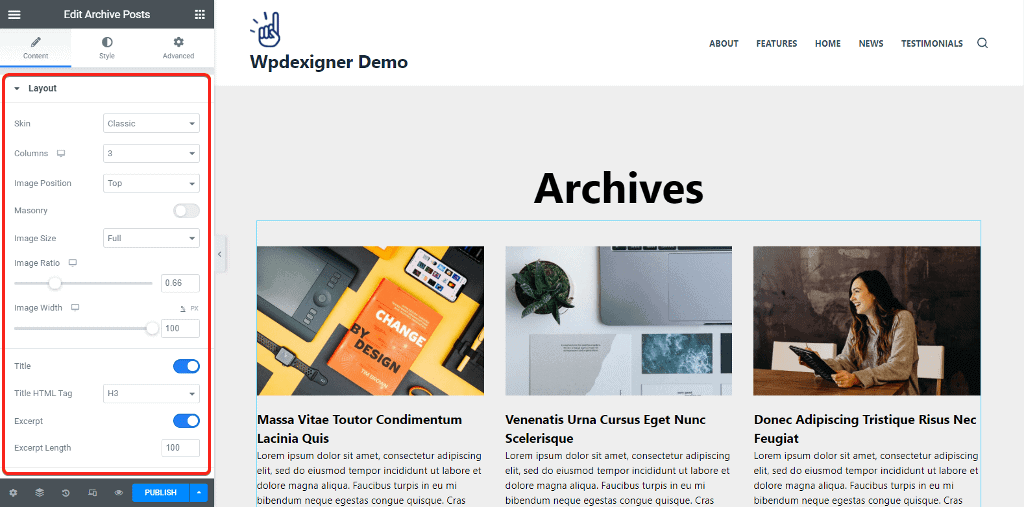
Once your design is ready, click on the Publish button and set the display condition to all archive pages.
5. Design WooCommerce Pages
The WooCommerce pages include a single product page as well as a product archive page. To design these pages, you can follow the same procedures as we did for the single post and archive pages.
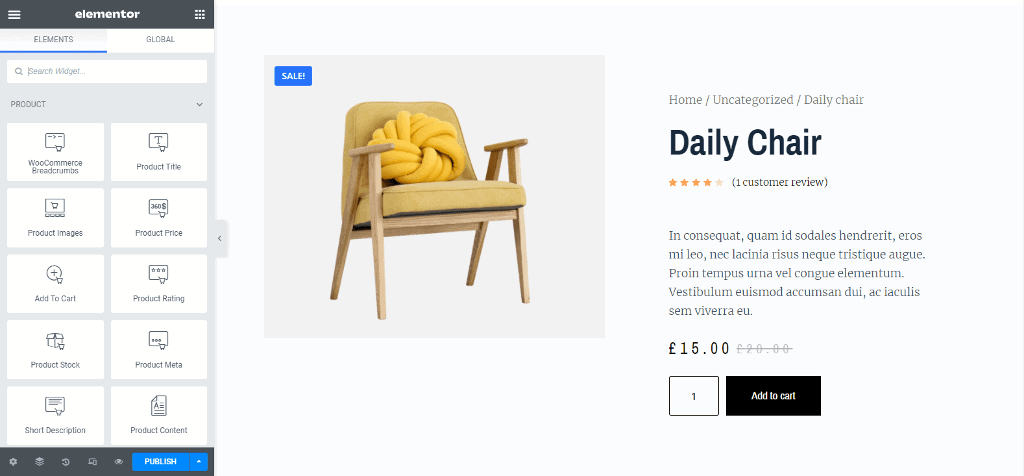
WooCommerce dedicated widgets will be displayed at the top in the widget panel for these pages. The widgets are fully customizable, allowing you to design the pages exactly how you want.
Do you think that’s all you can do with the theme builder? There’s more.
6. Design Search Result Page
If you run a blog or an eCommerce store, the search result page is important. When a visitor types a search term into the search box, the results are displayed on this page.
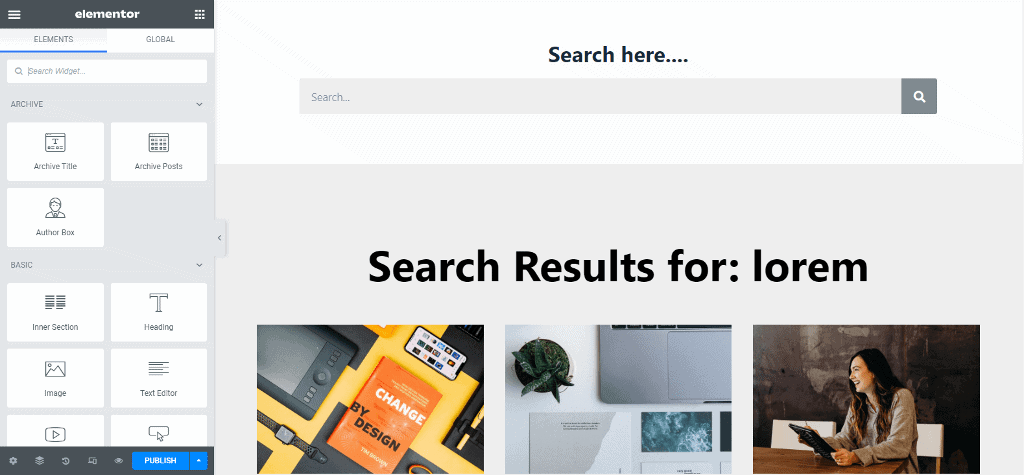
The options and templates available for this page are similar to those available for the archive page template.
Wrapping Up
The Elementor theme builder takes customization to a whole new level. Instead of relying on WordPress themes, it allows you to fully customize the website’s dynamic pages using the same drag and drop live editor.
The display condition allows you to specify where your custom design will be displayed on the website. This gives you the option of having different designs for different post types.
The Elementor theme builder is included with all paid plans starting at $49. Aside from the theme builder, Elementor includes a number of useful features, such as the Popup Builder. It is without a doubt a good value plugin.
FAQ Related to Elementor Theme Builder
Why is the Elementor theme builder not working?
If the theme builder isn’t working, it’s usually due to a plugin conflict. You can deactivate all plugins except the Elementor and Elementor Pro. Then, one by one, activate all plugins until you find the culprit plugin.
Is Elementor theme builder free?
Elementor theme builder is part of Elementor Pro which has paid plans starting at $49.
Why is my Elementor theme builder header not showing?
If the header created with theme builder does not appear on the website, make sure the display conditions are correctly set in the settings. This is true for all sections created using it.