Are you looking to install WordPress on cPanel hosting?
cPanel is a widely used control panel for site management in the hosting industry. Many popular hosting such as NameHero, Bluehost, GreenGeeks use cPanel to help you manage your website.
In this article, I will guide you through the step-by-step tutorial on how to install WordPress on a cPanel hosting with a single click.
Let’s get started.
What Is cPanel?
cPanel is a dashboard that makes it incredibly easy to manage the hosting server. What otherwise would require technical knowledge, with cPanel you can make changes to your hosting account using a simple interface that’s made for beginners.
The cPanel dashboard looks like the image below.
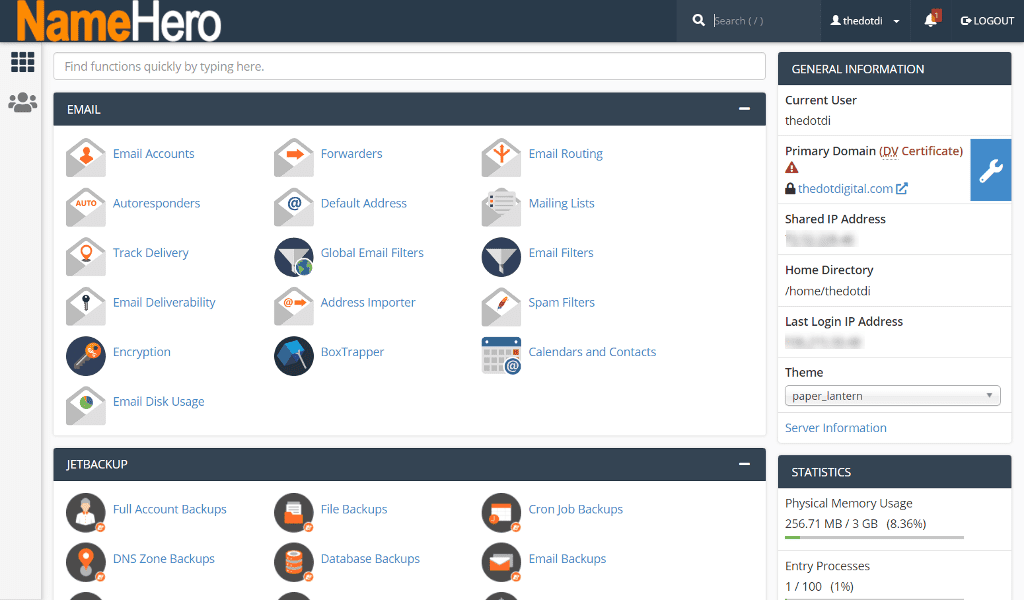
Depending upon the host, it may look a little different. It comes with multiple themes and your host might also tweak it with their logo and styling as Namehero has done in the above image.
But overall the interface will look the same with the center area housing links to manage different aspects of your hosting account. The right panel shows information about the server and your account.
What Hosting Companies Use cPanel?
Many hosting companies, especially ones that offer shared hosting use cPanel to make it easy for their customer to manage their website.
Below is the list of companies that use cPanel for their hosting.
- NameHero
- Bluehost
- A2 Hsoting
- GreenGeeks
- InMotion
There are many more cPanel hosting but I believe these are the best.
How to Install WordPress on cPanel Using Softaculous
In this tutorial, I will walk you through the step-by-step process of how to install WordPress on cPanel hosting using Softaculous.
1. Login to cPanel
When you sign up for a hosting account with any of the above hosting companies, you will receive a welcome email with a link and details about your cPanel account.
If you can’t find that link, you can still access cPanel by entering your domain URL as shown below.
http://www.yourdomain.com:2082
https://www.yourdomain.com:2083
If your site does not use HTTPS you can add :2082 at the end of the URL. If your site is HTTPS, you can access the cPanel login page by adding :2083 to the end of the URL.
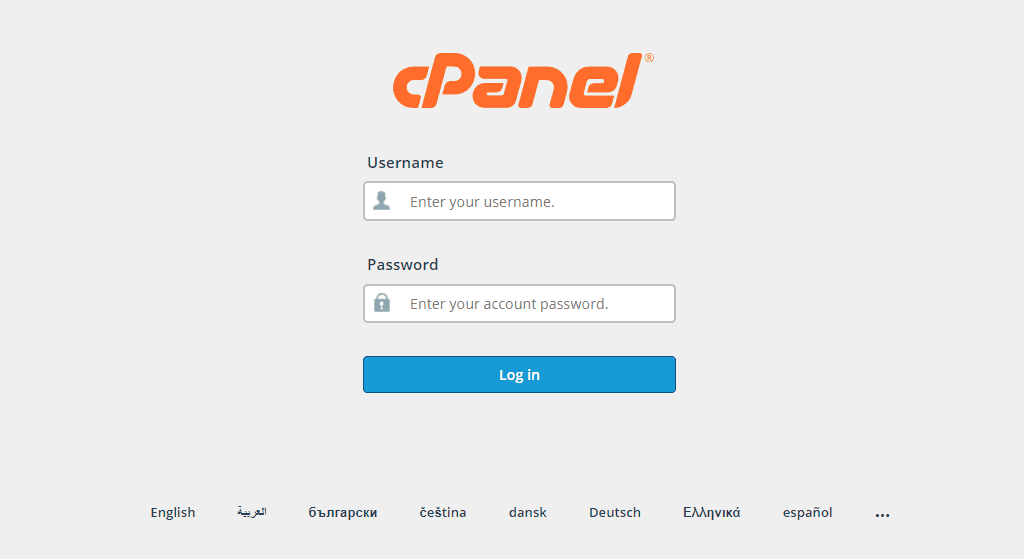
Once on the login page, simply put in the username and password that your hosting provider has given and you can access your dashboard. If you don’t remember your login credential, you can contact the support team to sort this for you.
2. Add Domain to Your Hosting
Once we are into the dashboard, the next step is to add the domain on which we want to install the WordPress.
If you have got the domain for free with your hosting account and is managed by them, it’ll be easy peasy to install the WordPress.
But if your Primary Domain or Root Domain is managed by another domain registrar, then you’ll need to change the domain’s DNS settings to install WordPress on it.
Similarly, if you have purchased a hosting plan that supports multiple websites, you’d want to add additional domains as Addon Domain and change its DNS settings.
Adding additional domains as addon domains saves you money as you don’t have to purchase new hosting for each domain and you can manage all websites from a single account.
Let’s see how to add an addon domain to our hosting account.
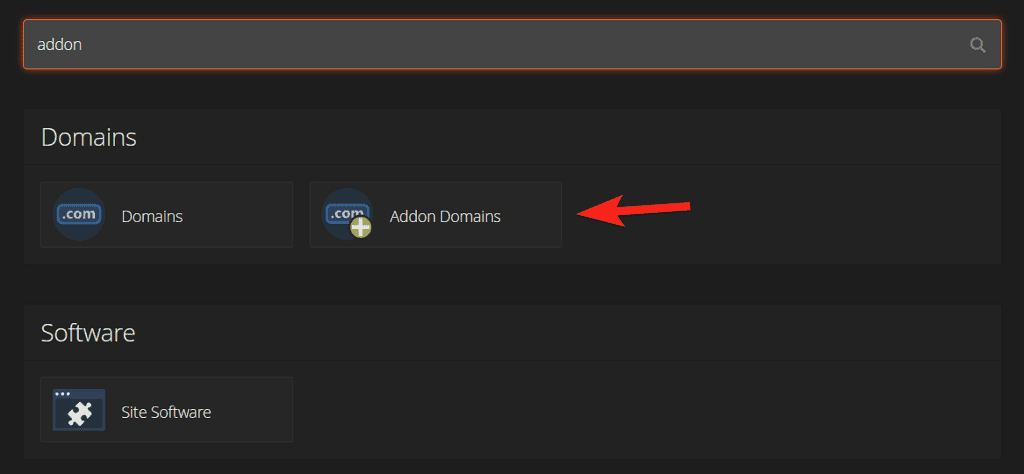
Once you are logged in to the dashboard, you can use the search bar at the top to search for ‘Addon Domain‘ and click on it.
On the new page, you’ll see fields to add a new addon domain. You can enter the domain name in the first field and click anywhere outside for the below text fields to automatically fill up.
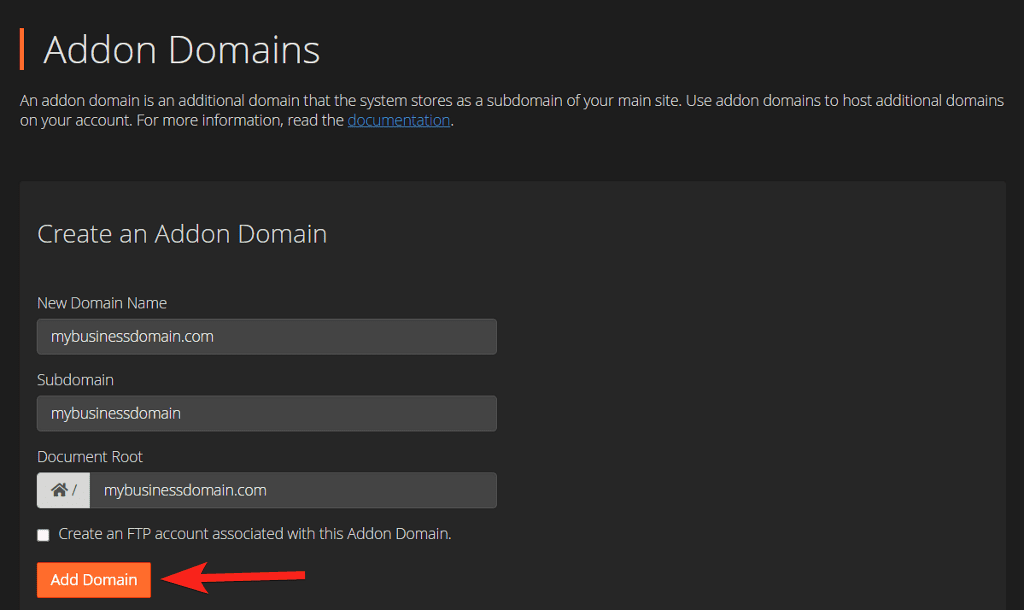
Once all fields are filled, you can click on Add Domain button to add it to your account.
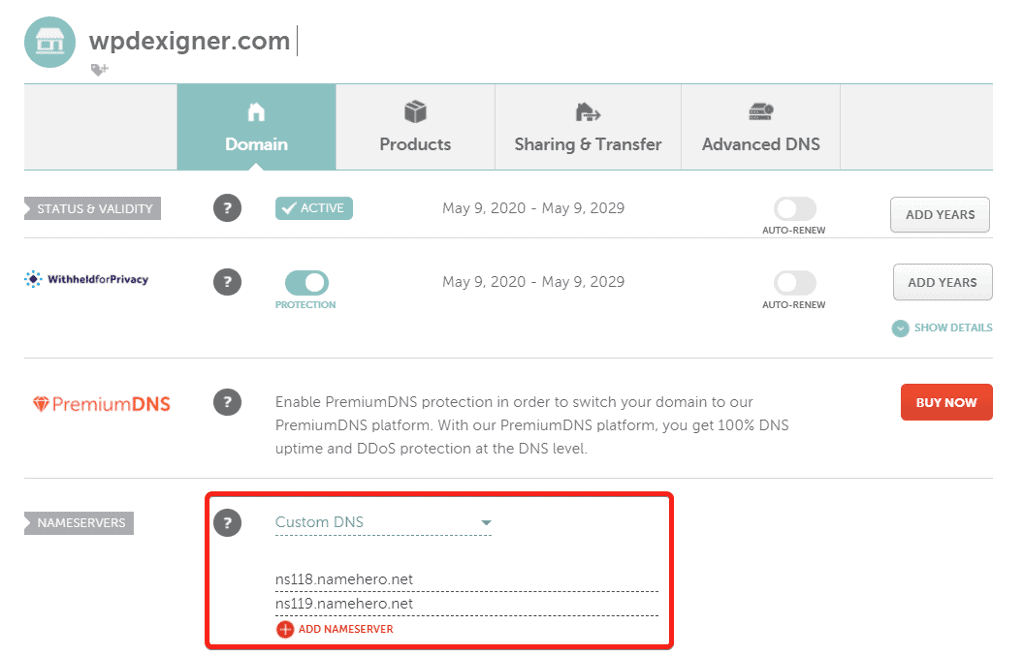
Now, the next step is to change the nameservers in the domain DNS settings to that of your hosting account. Nameservers are different for each hosting company and you can find this information in your hosting dashboard or you can ask the support team about it.

Once you have got the nameservers for your account, log in to your domain panel and change the name servers to that of your hosting.
DNS propagation sometimes takes up to 24 hours, so a bit of patience will be required. You can use MxToolbox to check if DNS records have changed.
Once the nameservers have successfully changed, it is now time to install WordPress on our domain.
3. Install WordPress Using Softaculous App Installer
cPanel includes a one-click WordPress installation using the Softaculous App Installer. It is one of the simplest methods for installing WordPress and takes less than 5 minutes to get your website up and running.
To make things easier for you, I’ll walk you through the steps of installing WordPress on the domain we just added to our cPanel account.
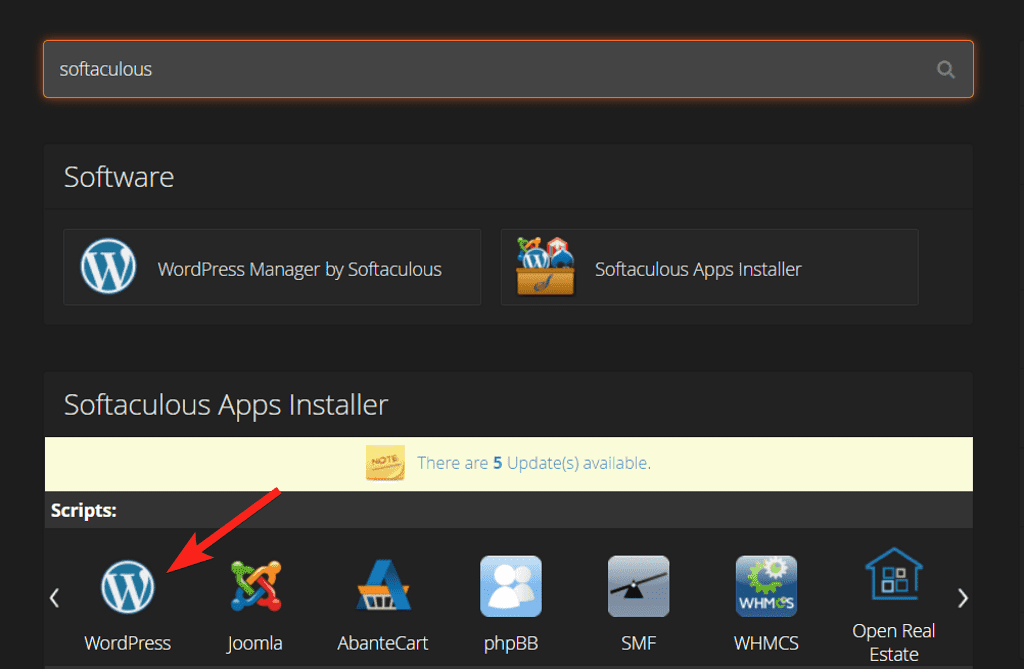
Go to your main cPanel dashboard and enter the keyword ‘softaculous’ in the search bar. You’ll see different results popup. Click on WordPress under scripts.
It’ll take you to the Softaculous WordPress Installer page where you can click on the Install button.
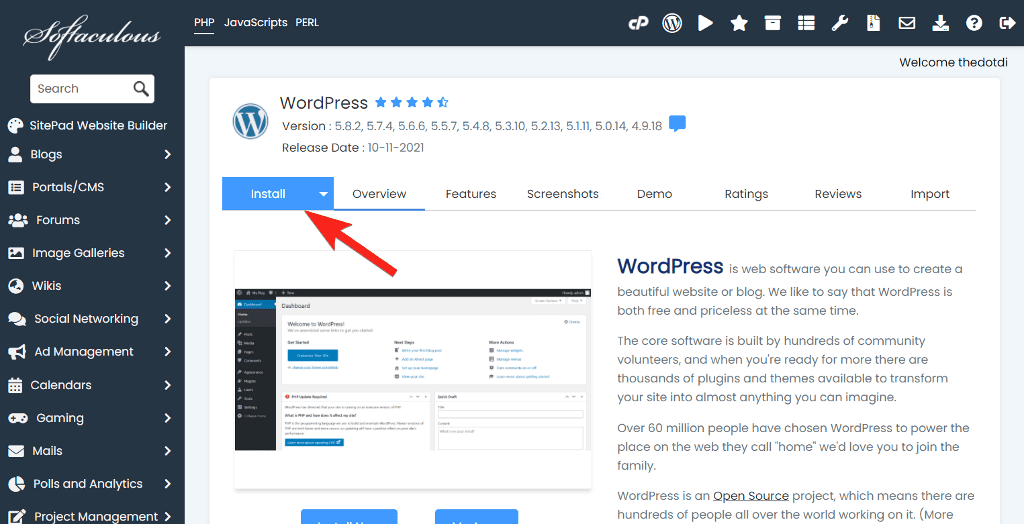
Let’s now see the actual software installation steps for WordPress.
Software Setup
When you click on Install, you’ll be taken to a new page where you need to define the domain on which you want to install the WordPress.
First, under Software Setup, choose if your domain has SSL or not. Most web hosting these days provide free SSL through Let’s Encrypt, so if your host is one of them, you can select https:// for your website.
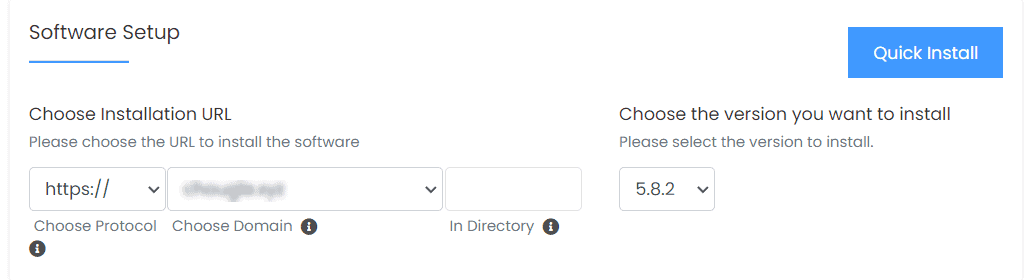
Next, from the dropdown, choose the domain we previously added and leave the directory field blank.
Softaculous WordPress installer lets you choose the WordPress version you want to install. On a new installation, it is always better to go with the latest version.
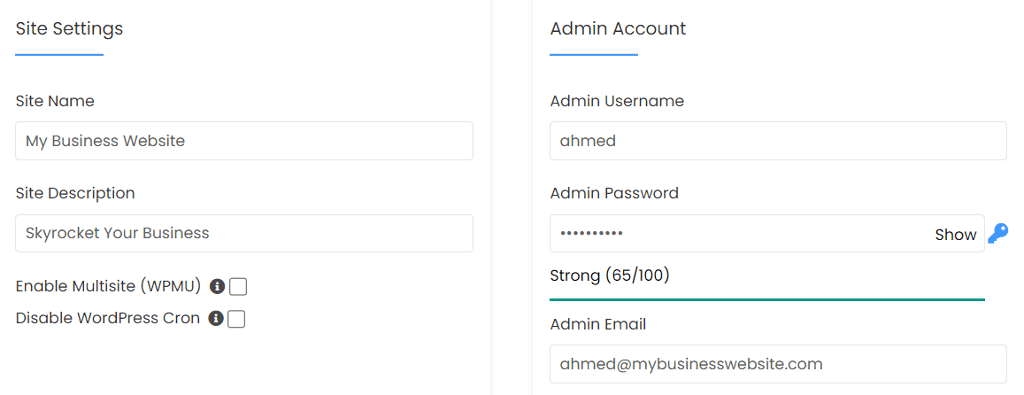
Site Settings and Admin Account Setup
Next, scroll down and we need to fill in the details for website setup.
First, in the Site Settings section, enter the name of your website and a tagline for it. You can add anything and later change it if you want.
Next, there are two checkboxes, and let me explain them in short to you.
WordPress allows multi-site installation wherein if you have multiple WordPress websites, you can control them from a single dashboard.
Similarly, WordPress allows you to schedule things and take automatic action as defined. An example of this is that you can schedule a blog post to go live at a certain time. This is achieved with a cron job in WordPress.
Depending upon if you want a multisite installation, you can select the first checkbox. For the cron job, I will recommend you keep it untick.
The next part is the admin account setup that’ll have the administrator access to manage the website. There are a few fields where you need to enter some information and they are:
Admin Username: username of the admin account that’ll be used to login to the website.
Admin Password: A strong password to log in to the website.
Admin Email: An email address that will receive important updates regarding the website.
Once you have added the details for the account, scroll down to select the plugin and theme you want to install.
Language, Plugins and Theme
it’s now time to select language, plugins, and themes for the website.
The first option is the language option, and you can choose your preferred language from the list or leave English as the default.
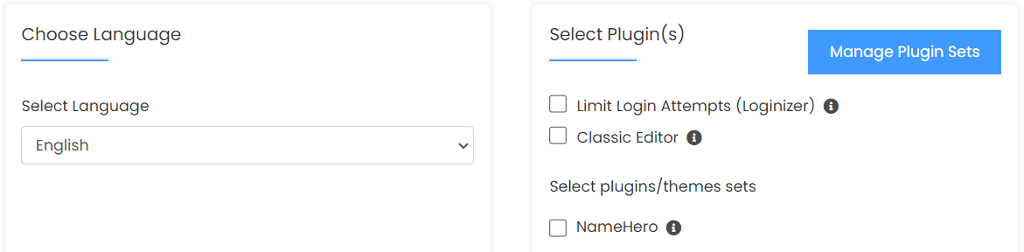
Next, don’t select anything for the plugins and the theme and scroll down to install the WordPress. You can enter an email address to where installation details will be sent.

Once you click the Install button, it’ll take a minute or two before you can see the success message.
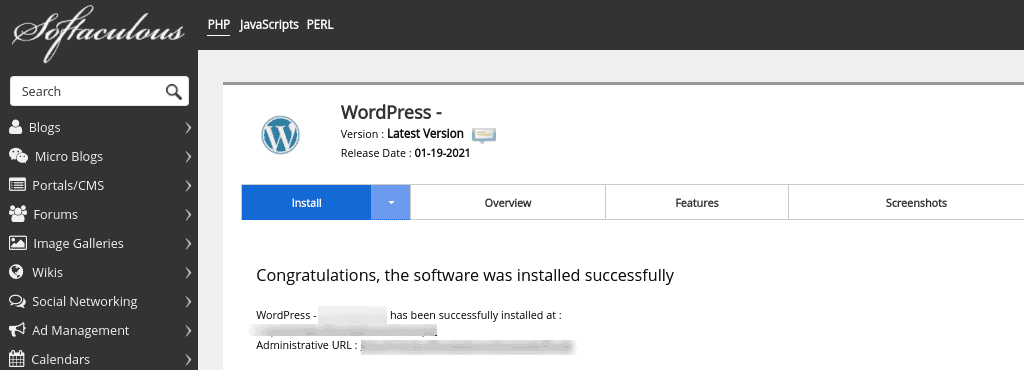
It will show you the website URL along with a URL to access the admin panel of the website. The URL for WordPress backend login is usually https://yourdomain.com/wp-admin/. You can go to this URL and enter the username and password you had used during the installation.
That’s it! You have successfully learned how to install WordPress on cPanel hosting.
Next, Check Out Our WordPress Services
WordPress is a flexible tool when it comes to creating websites. With so many options, it can be a little confusing for some.
I’ve been using WordPress for five years and am very familiar with it. You can learn more about the various WordPress-based services I provide to help beginners in their journey.
That’s it! I hope this tutorial helped you install WordPress on cPanel hosting.