An intranet is an internal organization website that is exclusive to employees. It is used to communicate information and distribute data between employees within an organization.
If you’re a small business, having all business files and documents in one place, available to all or certain employees, is very important for a smooth workflow.
Although there are specialized solutions out there for a document management system, they are expensive and hard to implement without a dedicated team. Small businesses often don’t have this kind of resource.
This is where an intranet website using WordPress comes into the picture. Small businesses can benefit from an intranet network by setting up a private website on WordPress that requires little to no technical knowledge. Furthermore, they can customize it to meet the needs of the company.
In this comprehensive guide, we’ll show you the process of setting up a private intranet using WordPress. Let’s begin!
Why Do Small Businesses Need an Intranet Website?
Small businesses that use an intranet website can benefit in several ways. The three important benefits are:
- It helps improve communication between employees, which can result in increased efficiency and better teamwork.
- It serves as a central location for storing important documents and files, which can help to keep everything organized and easy to find.
- It helps to improve collaboration between departments and makes it easier to share information across the company.
In addition to being a valuable resource for employees, it also allows them to keep track of employee hires, departures, and performance reviews. Plus, it can also be used as a way to provide training and access to forms.
How Does Using WordPress as an Intranet Benefit Small Businesses?
WordPress comes with a lot of flexibility that can benefit small businesses in creating intranet website that caters to their needs.
Some of the benefits of using WordPress are:
- Implementing an out-of-the-box solution is expensive and complicated for small businesses. WordPress is easy to use and will only cost you a few bucks depending on the plugins and theme you choose.
- Your files are vulnerable to security risks if you store them on third-party servers. However, with WordPress, you can store them on your own server while maintaining complete control over the data.
- Other platforms do not allow you to customize or create extensions to make it work exactly how you want it to. WordPress has over 58,000 free plugins that you can use to customize it exactly how you want.
- Most other solutions lock you in and don’t allow you to export your data and move on to something else whenever you want. With WordPress, you own every byte of data and can export it in any format you want.
How To Create an Intranet Site Using WordPress To Easily Manage Your Documents
As it’s clear that having a WordPress intranet website offers complete flexibility, we’ll use it for this tutorial. But before we start with the actual steps of the tutorial, let’s first take a look at the different ways to create an intranet.
Different Types of Intranet
When it comes to an intranet website, there’re mainly two ways to create it.
Locally Hosted – Employees will only be able to access the company intranet if they’re connected to the local network within the organization’s physical office space or via a VPN.
Cloud Hosted – Employees can access the intranet from any location as long as they’ve got an active internet connection.
In this article, we’ll go over how to set up a locally hosted WordPress intranet site.
What Tools Do You Need for the WordPress Intranet?
Local by Flywheel – It’ll help you turn your local computer into a server to host the WordPress website.
WordPress Theme – It’ll serve as the foundation for your website, allowing you to customize it however you want. You can use a full-fledged theme like Woffice and import a premade demo or a starter theme like Astra to customize it the way you want.
Download Monitor – It’s a WordPress plugin to help you manage and securely store your documents.
User Role Editor – It’s a WordPress plugin to create custom user roles based on different positions in your organization.
UsersWP – It’s a WordPress plugin to customize the website login page and restrict registration to business email only. You can also use this to create an employee directory.
Create a Localhost Environment and Install WordPress
To begin, install Local by Flywheel on the computer that’ll host the website. When selecting a computer, choose one that’s powerful and can always stay online.
We’re using Local as it’s very easy to use. In just three steps, you can set up a local server and install WordPress on it.
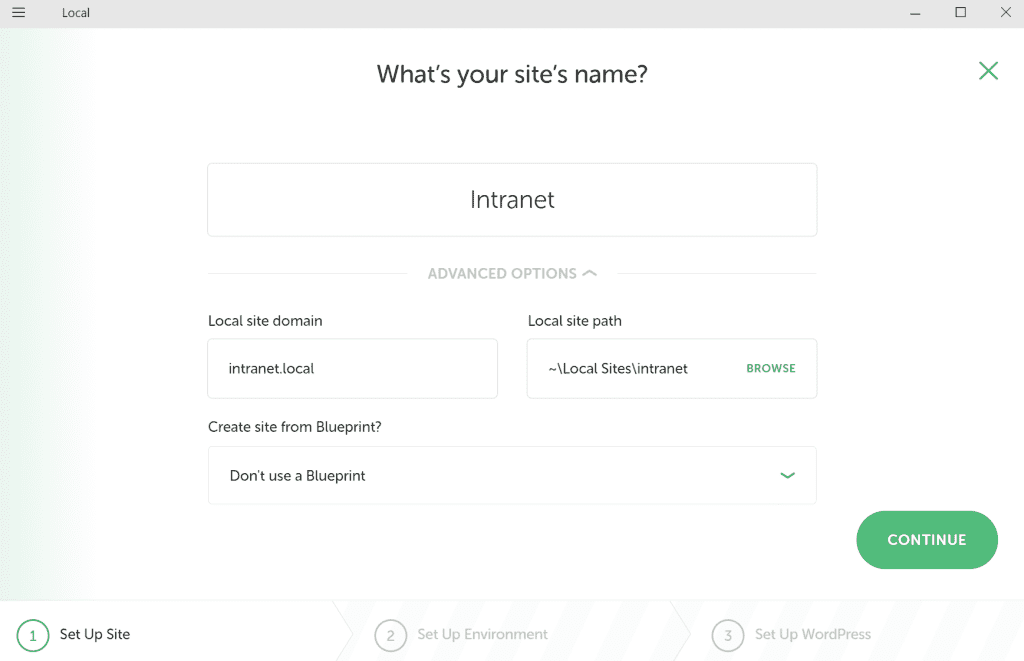
After installing the application, click the plus icon “+” in the bottom left corner and enter your desired site name and domain. Then, click the Continue button to configure the local environment.
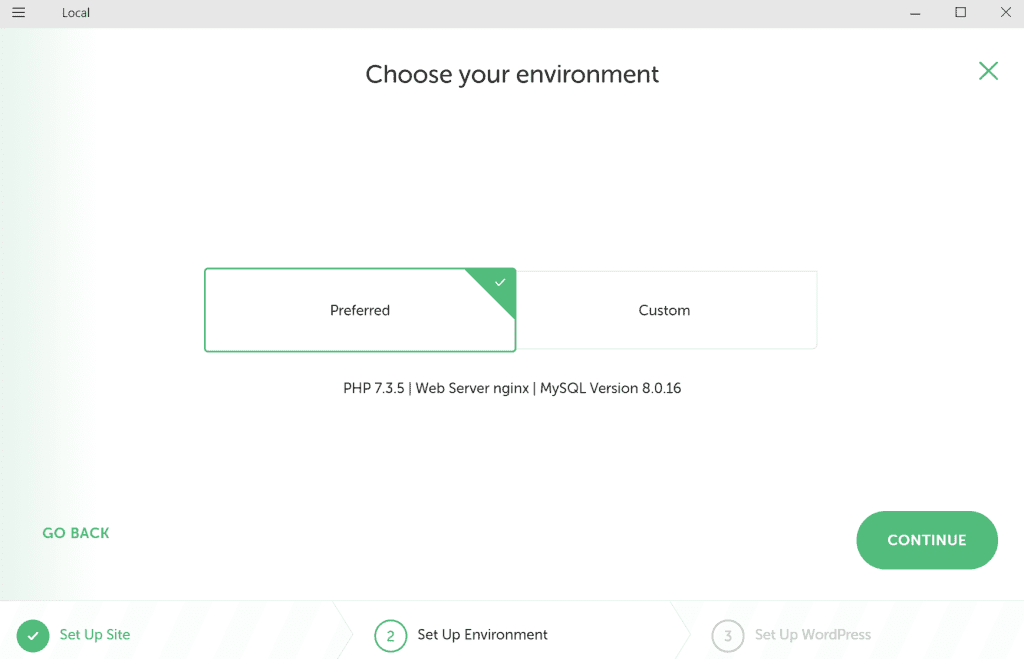
You can either select a predefined environment or create your own. To keep things simple, we’ll choose the predefined option and proceed to the next step.
In the final step, you need to enter a username, password, and email address that will be used to set the administrator of the website.
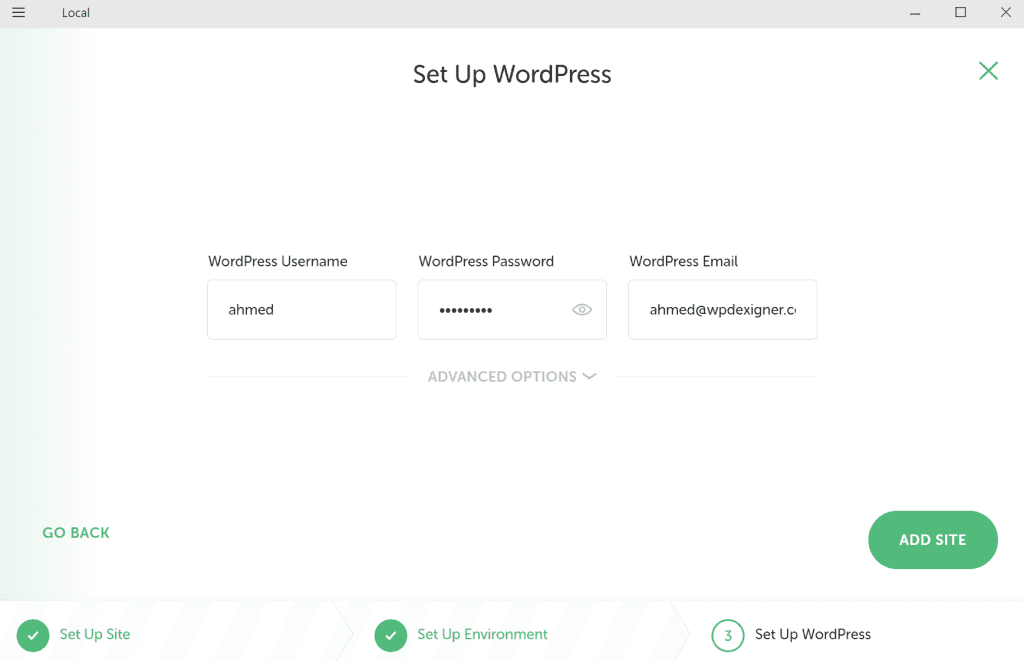
Click Add Site button and wait for a few minutes as Local configures the localhost and website for you.
Setup WordPress and Install the Theme
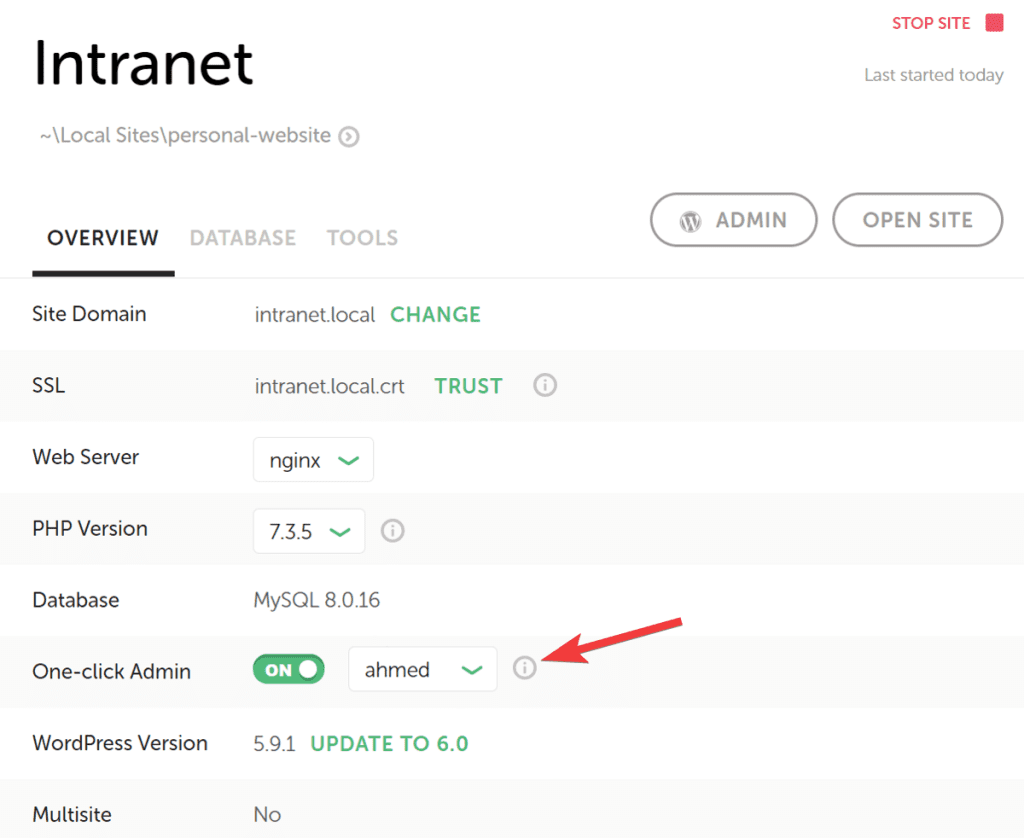
After you’ve successfully installed WordPress, you can access its backend by adding “/wp-admin/” to the end of the URL and then logging in with the credentials we used during the installation.
You can also enable One-click Admin Login in Local to access the backend without entering the login details.
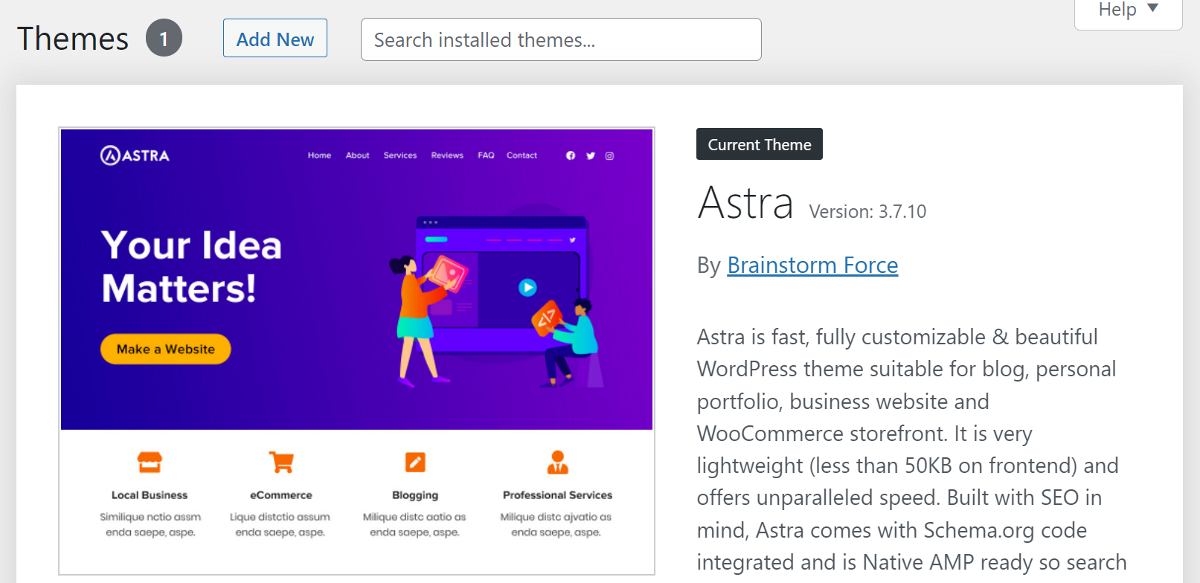
For this tutorial, we’ll use the Astra starter theme to create and customize the intranet website. You can read the article from Download Monitor on the best WordPress intranet themes if you are looking for a full-fledged theme that comes with pre-built demos.
Once you’re into the WordPress dashboard, go to Appearance > Themes and click on Add New. Search for Astra and install and activate the first result that you see.
You can also install the Starter Templates plugin from Astra to import readymade templates for your website.
Once we’ve got the foundation done, let’s create a few custom user roles in WordPress based on the different positions in your organization.
Create New Custom User Roles Based on Positions
A company comprises different people working in different positions with different responsibilities. You’d want to limit access to your documents based on the position of the employee in your company. To accomplish this, you’ll need to create new user roles and assign them to your employees during account registration.
WordPress comes with four default user roles. They are:
- Administrator
- Editor
- Author
- Subscriber
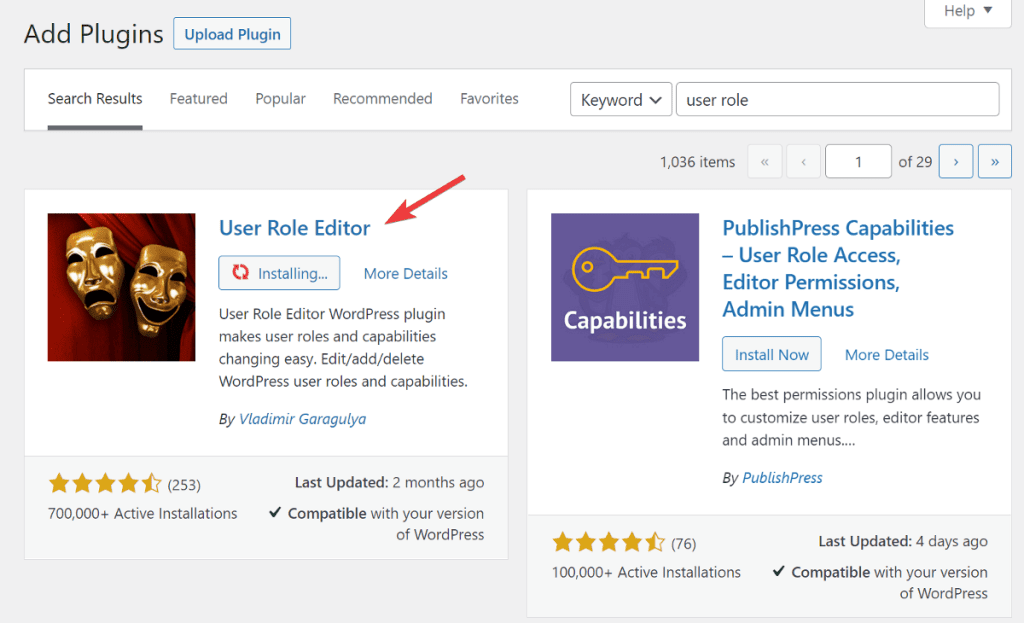
For an intranet website, we’ll need custom user roles. This can be easily accomplished using the User Role Editor plugin.
From your WordPress dashboard, go to Plugins > Add New and search for the plugin. Install and Activate the first result that you see.
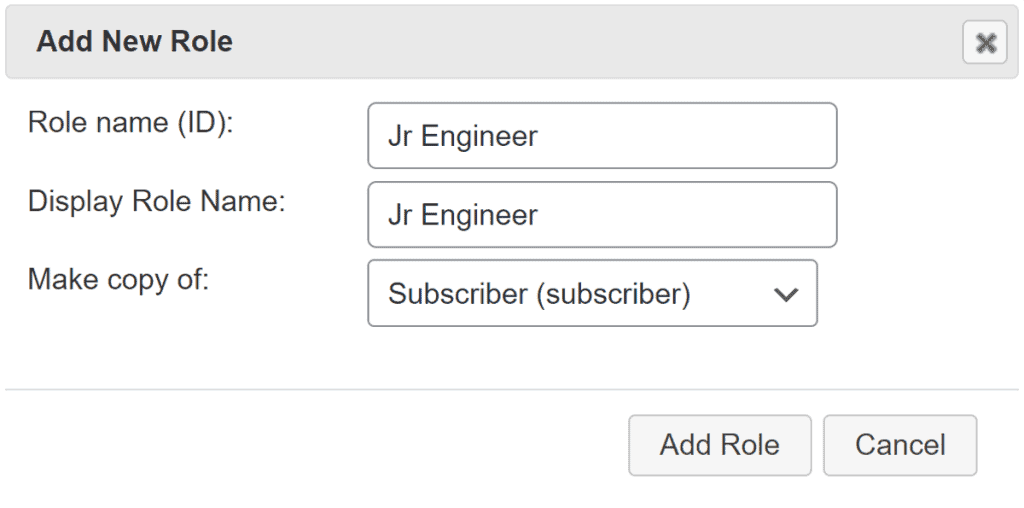
Once installed, go to Users > User Role Editor and click on Add Role from the right sidebar.
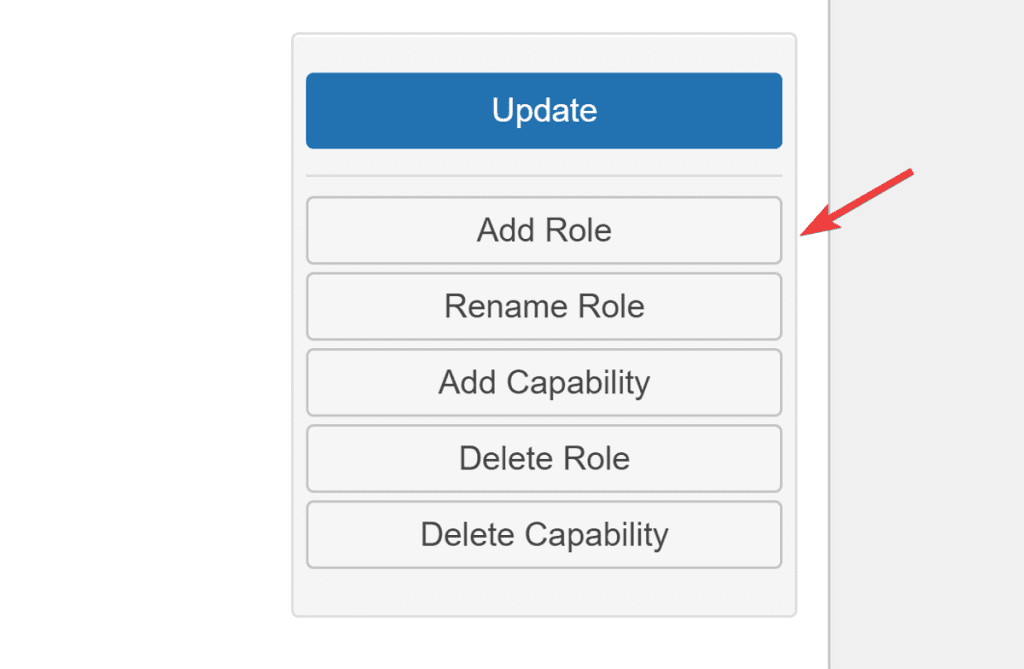
This will open a popup window where you need to enter the role name and a display name. As employees won’t be accessing the WordPress backend, you can assign the capabilities of a Subscriber, and then click on Add Role button.
Similarly, add new user roles for all different positions in your company.
After you’ve added all custom user roles to the website, the next important thing is to set up a document management system on the website.
Let’s see how to do that.
Install the Download Monitor Plugin and Advanced Access Manager Extension
Download Monitor is a free plugin that lets you create a document management system inside a WordPress website that’s easily accessible to employees. It lets you categorize the documents for easy management.
Download Monitor also has a Pro version that comes with an Advanced Access Manager extension to let restrict documents based on different rules such as:
- User Roles
- IP Address
- Username
It also lets you add download and date limit restrictions to the documents.
It’s because of these features, we believe Download Monitor is an ideal plugin for the Document Management System of an intranet website.
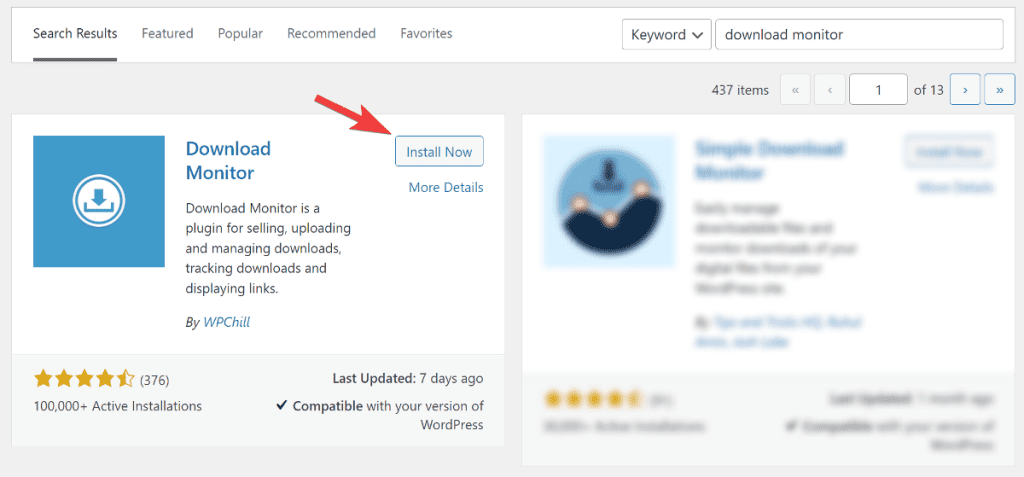
To install it, navigate to Plugins > Add New from your WordPress dashboard and search for Download Monitor. Install and activate the first result you see.
As soon as you install the plugin, you’ll see a message box prompting you to click the “click here” link to finish the installation.

After the installation is complete, you’ll be taken to a new page where you can set up important pages with a single click.
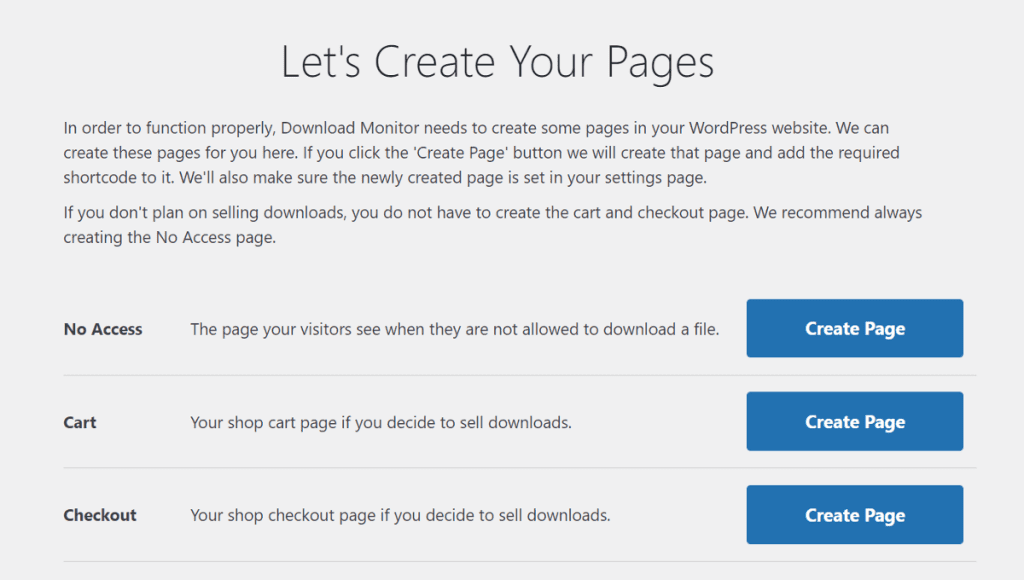
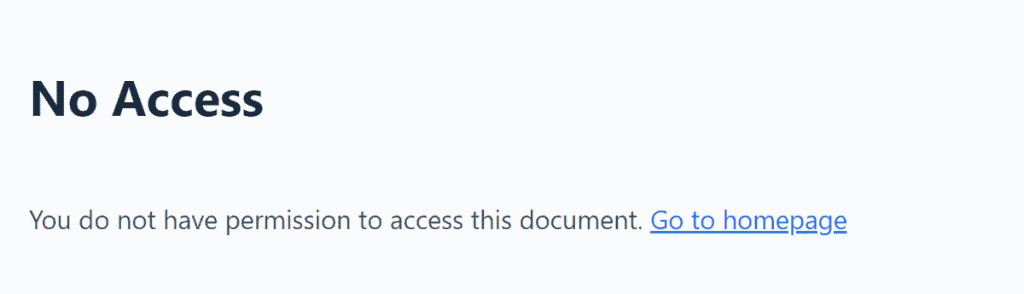
Because we’ll not be using Download Monitor to restrict document access, click the Create Page button next to No Access and leave the other two options untouched.
Employees without the necessary permissions will be directed to the No Access page.
Along with the Download Monitor plugin, we also need the Advanced Access Manager extension to restrict document access based on the custom user roles we created.
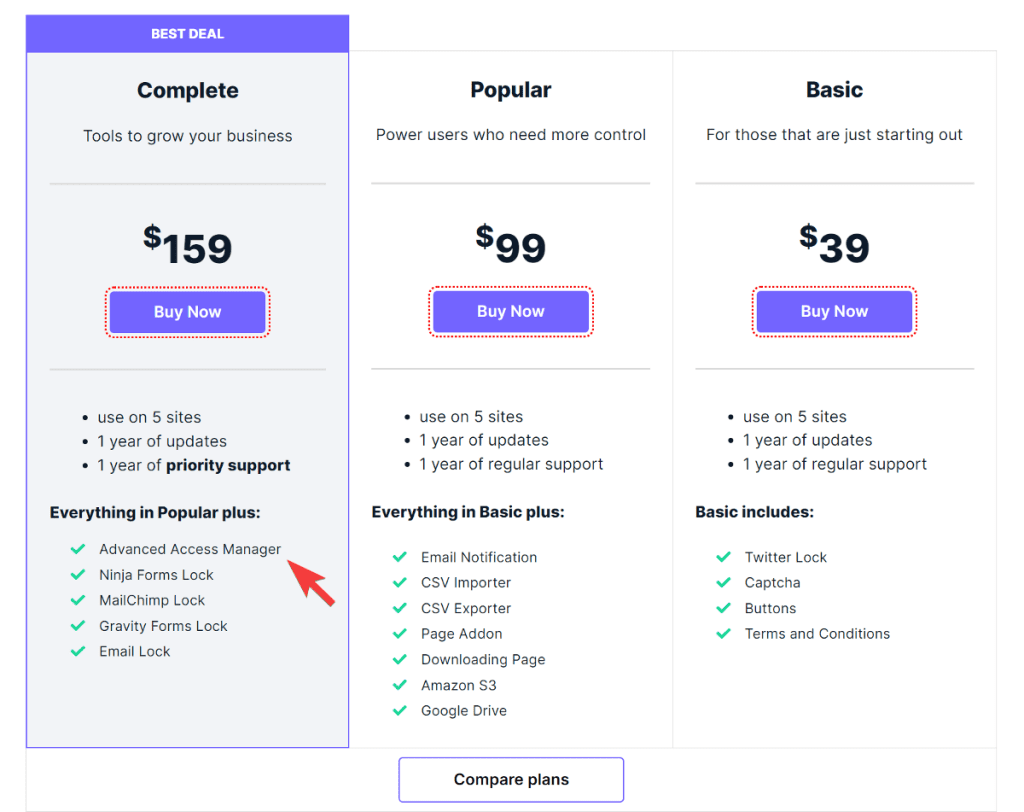
Advanced Access Manager extension is part of Download Monitor Pro, so to use it, you must purchase the Complete Package.
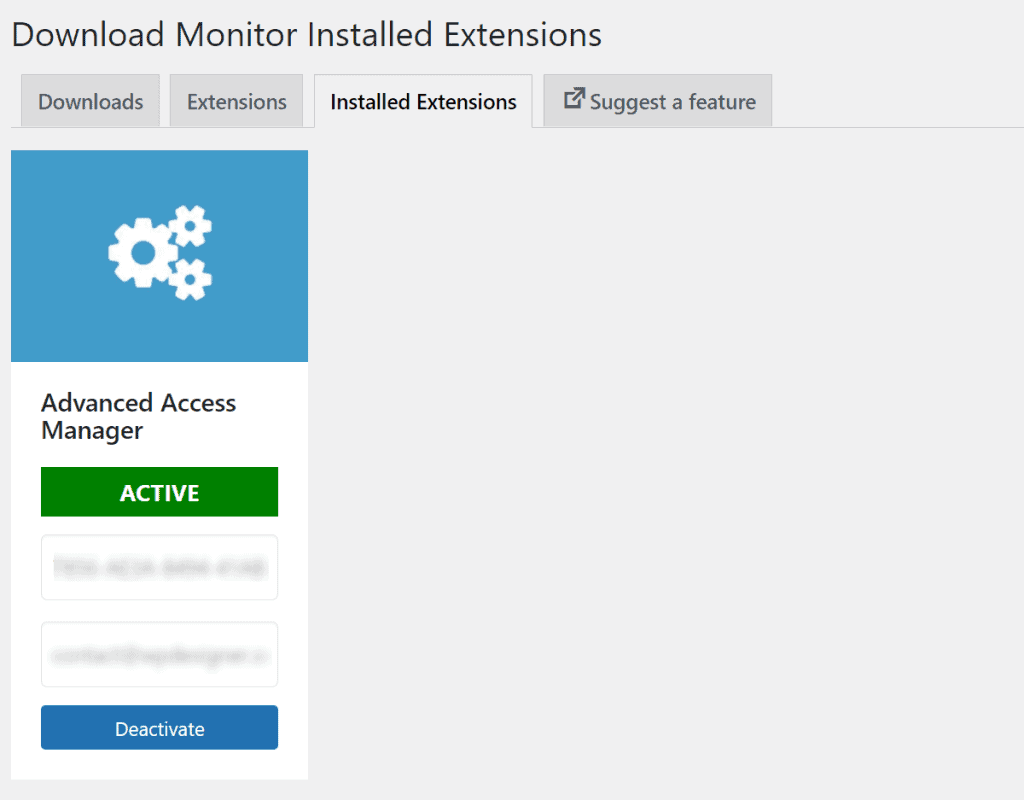
After you’ve downloaded the extension file, return to your WordPress dashboard to install and activate it. After installation, you need to enter the license key to unlock the feature and receive future updates.
Now that the setup of Download Monitor is complete, let’s look at how to add and organize documents on the website.
Add Documents to the Website
To start adding documents, go to Downloads > Add New and give your document a title.
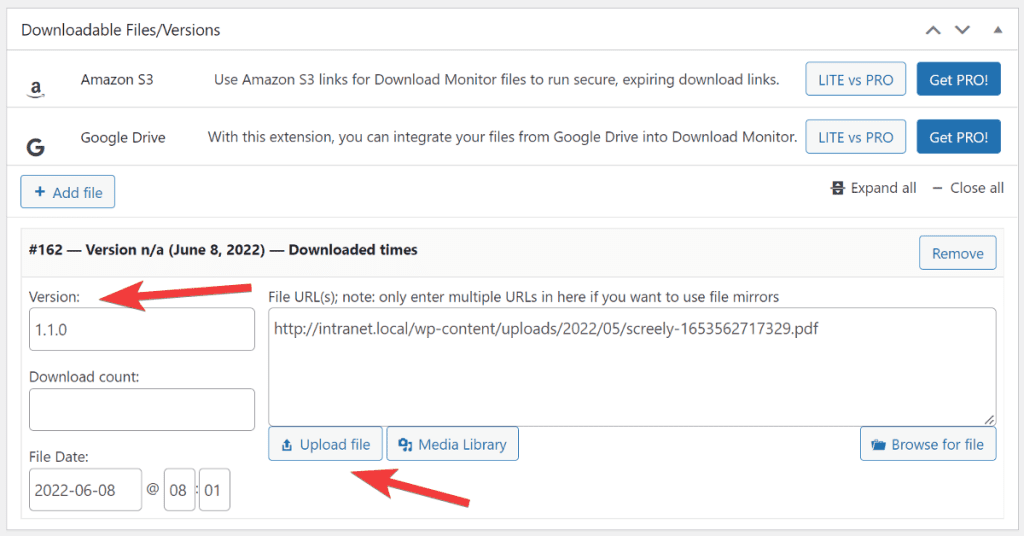
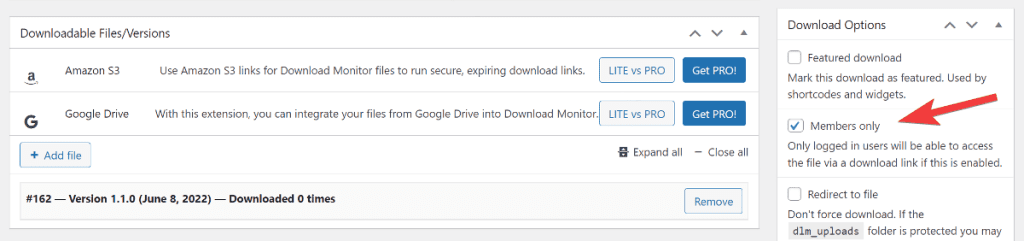
Scroll down to the Downloadable Files/versions metabox and click the Add File button. This will open a metabox where you can upload the document file to your local server. You can also include a file version to help organize updated files in the future.
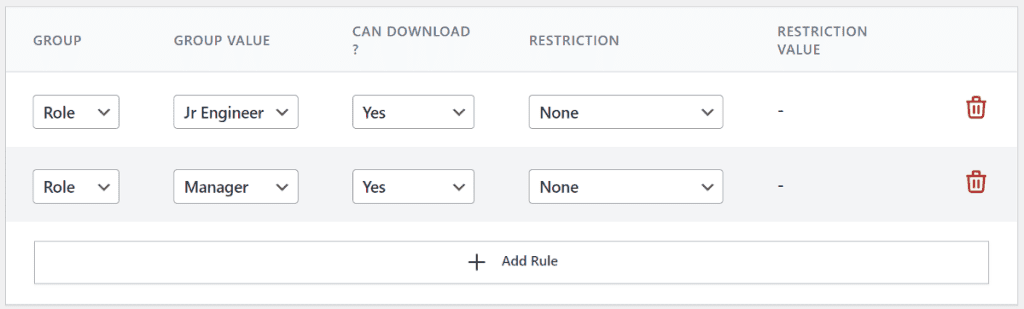
Next, we need to limit access to the file to certain users with permission. For this, we’ll use the Advanced Access Manager extension.
To limit file access to people with a specific designation, click the Add Rule button, select Role for the group, and then select the appropriate user role. If you want, you can add multiple rules to the same file.
In order to make it easy to organize the files, you can add a category and assign it to the document.

You can also check the Members Only box from the sidebar so that only logged-in members from your company can see the document.
Finally, you can publish the download, and proceed to add other documents to the website.
Show documents within the same category on a single page
After you’ve added all files to the backend of the website, you need to give the employees an easy way to find and download them as needed.
Download Monitor lets you display files from specific categories on a single page using the Page Addon extension.
After installing and activating the extension, create a new page and the following shortcode:
[download_page include_categories=20, 21]
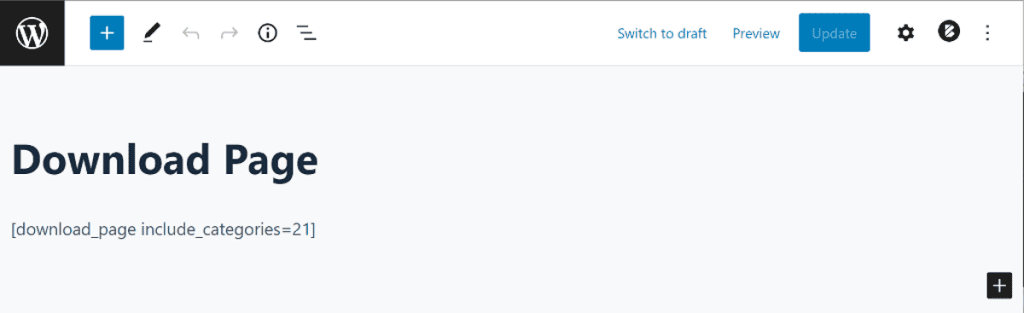
Replace 20 with the comma-separated list of category IDs that should be displayed. You can check our Page Addon documentation page to find out more about the different arguments that you can use in the shortcode.
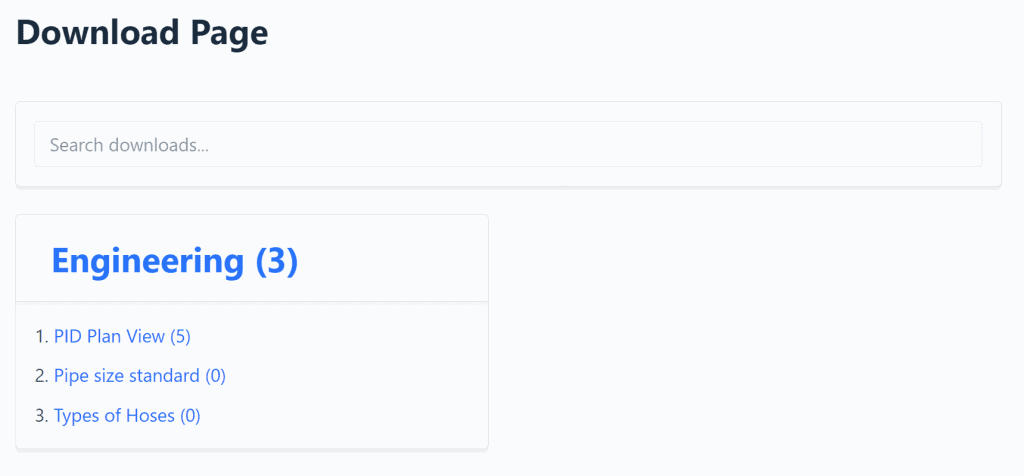
Once you’ve added the shortcode and published the page, employees will be able to see documents displayed under different categories based on the user role.
Allow Users To Log In to the Website
After your website is ready, you need to allow your employees to log in to the website to access the documents.
UsersWP is a free and simple user registration and user profile plugin available on the plugin repository.
It comes with numerous options to customize the login and registration page. It also has paid addons such as Restrict User Signups which lets you restrict registration to business email only.
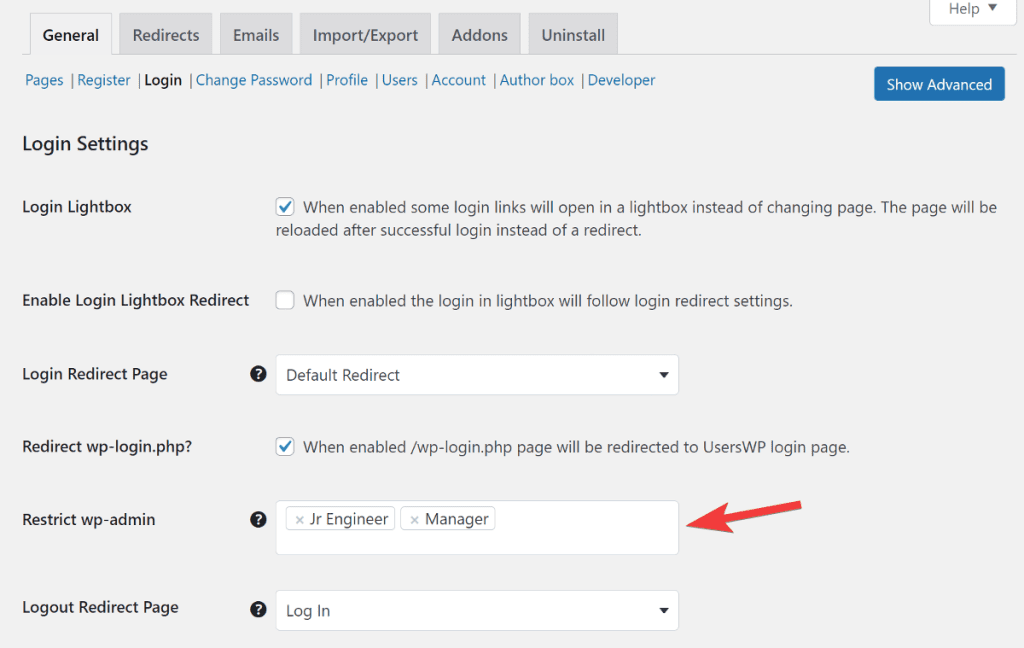
After installing and activating the plugin, navigate to UsersWP > General > Login, and in the Restrict wp-admin option, select all user roles to whom you don’t want to give backend access.
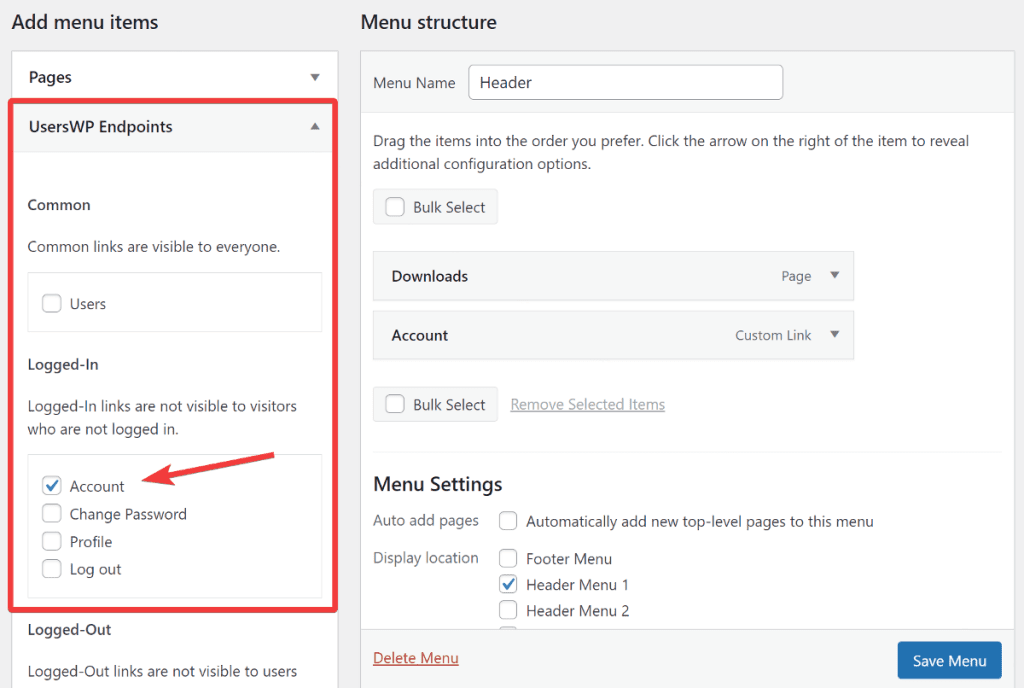
Next, we need to add a link to the Account page in the header so that employees can log in to their account.
From your WordPress dashboard, go to Appearance > Menu and under the UsersWP Endpoints in the sidebar, add Accounts to the Header Menu.
UsersWP also has many other features such as a user directory, instant notification, and others that might be beneficial for an intranet website.
Keep a Log of Which Files Are Downloaded
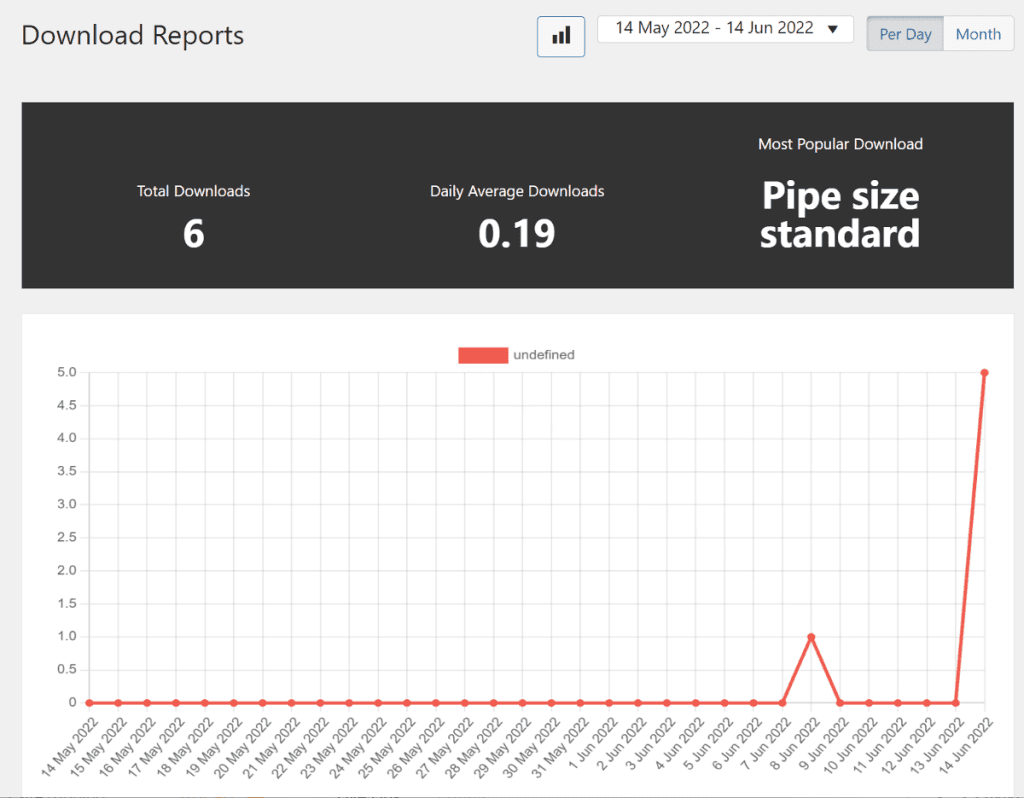
Download Monitor also comes with an advanced reporting dashboard that lets you see which files are being downloaded and how many times. This is a handy feature to keep a log of what files the employees are accessing.
The report gives you details such as:
- How many times each file is downloaded
- The most popular file
- Who has downloaded what and when
The data is displayed in a chart and bar graphs on the reporting screen for quick understanding.
Now our website is ready, but how do we make the website accessible on all computers within the same network in your office?
Continue reading to find out.
Connect Different Computers on the Same Network
We can access the local WordPress website on the computer where it is created, but not on any other computer. To access it on other computers within the same network, we need to create a virtual network.
Let’s see how to create it.
Find the IP of the Computer
After successfully installing WordPress, you’ll need to figure out the LAN IP address of the computer hosting the localhost site so that other users on your network can access it as well.
The instructions to find IP will depend on the OS your computer is running. You can refer to the below articles to find IP based on your OS.
As an example, we’ll show how to check the IP on a Windows machine.
Press the Windows key on your keyboard and search for the Command Prompt.
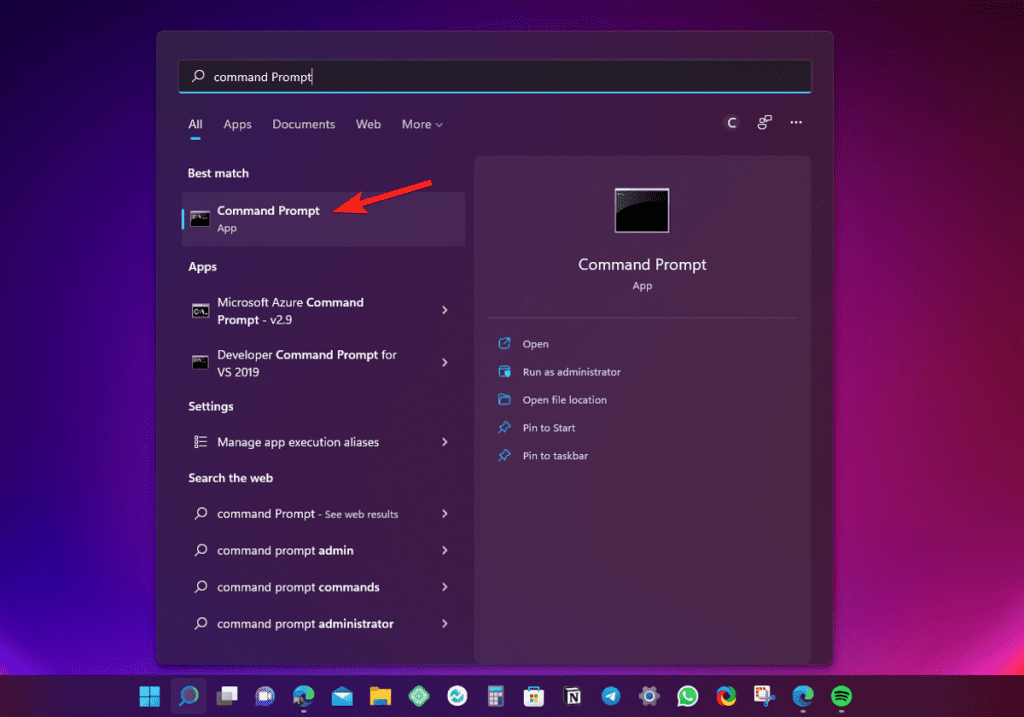
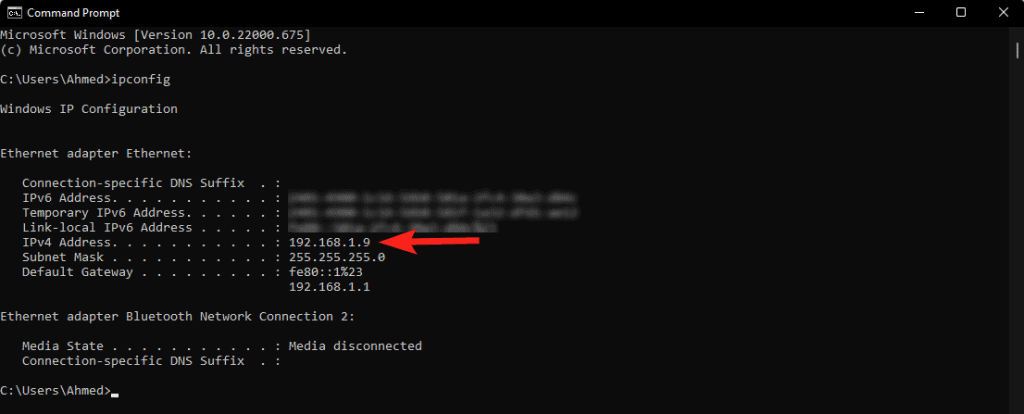
Launch the application, type ipconfig and press enter. This will provide some network information.
You need to scroll down and look for the IPv4 Address. Copy the IP address that you see and note it down somewhere.
Connect Other Computers to the Local Website
To connect the local website to other computers within the same network, we need to add the IP address to the host file. Depending on your OS, you can find the host file at:
- Windows: \Windows\system32\drivers\etc\hosts
- Mac: /private/etc/hosts
Open the host file and add the below line to it.
192.168.1.9 intranet.local
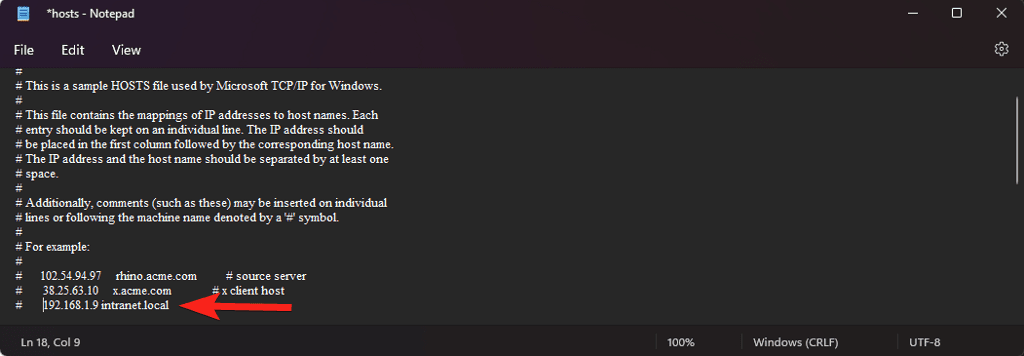
Make sure to replace the IP address with the address of the computer running the Local software.
You must repeat this on all computers where you want the website to be accessible. Now, whenever employees type https://intranet.local into their computer, it will now open the intranet website.
Wrapping Up
Creating an intranet website is beneficial for local businesses as it keeps the documents organized in one place and allows for easy information flow between departments.
You can create an intranet website using WordPress and customize it the way you want. For this, you need a document management system and the best way to do it is by using the Download Monitor plugin which lets you restrict files based on user roles.
It also has an advanced reporting dashboard that lets you keep a log of which files are being downloaded by which employee.